![]()
Getting Started
![]()
Getting Started
更新 2020/11/01
どうも、こんにちは!JellyWareです。
Getting Started!! Riiiver tutorialの第15弾後編となります。
このシリーズは、Riiiverやプログラミングを学び、初心者の方でもEco-Drive Riiiverを活用したオリジナルアプリを理解して作れるようになることを目指します。
今回は前回の続きです。作成した「Piece JSON」と「Piece Func」について解説します。
それでは、まず「Piece JSON」から確認します。以下が作成したJSONデータです。
{
  "title": {
    "en": "Time Training",
    "ja": "時計の読み方トレーニング"
  },
  "version": "1.0.0",
  "sdkVersion": "1.0.0",
  "deviceId": "none",
  "vendorId": "none",
  "description": {
    "en": "Quiz anyone on how to tell time on a traditional watch. When you trigger this Piece, the hands will spin to a random time, and then send that time to your connected LINE account in number format so that you can confirm the answer. Note:  You will need to use a LINE Notify account (https://notify-bot.line.me/) in order to create and copy an access token that can connect this Piece to your specific LINE account.",
    "ja": "時計の読み方を子供に教えるためのピースです。ピースを起動するとランダムな時刻に合わせて針が回転します。答えの時刻は、接続しているLINEアカウントに数字形式で送信され、LINE上で確認することができます。※このピースを特定のLINEアカウントに接続できるアクセストークンを作成してコピーするには、LINE Notifyアカウント(https://notify-bot.line.me/)を使用する必要があります。"
  },
  "blockType": "service",
  "executor": "RBCCommonWebServiceExecutor",
  "serviceProxy": {
    "service": "lineNotifyTimeQuiz"
  },
  "osType": "none",
  "categoryIds": ["cat_0004", "cat_0007"],
  "preferences": {
      "type": "object",
      "properties": {
        "accessToken": {
          "x-input-type": "text",
          "type": "string",
          "x-title": {
            "en": "Line Notify Access Token",
            "ja": "LINE Notify の アクセストークン"
          },
          "x-description": {
            "en": "Enter access token to connect to your LINE Notify account, which can be created at https://notify-bot.line.me/",
            "ja": "LINE Notify を使用するにはアクセストークンが必要です。"
          }
        }
      }
    },
    "output": {
        "type": "object",
        "properties": {
          "correctTime": {
            "type": "string",
            "format": "time"
          }
        }
    }
}
PieceJSONについては第11弾で解説していますので、ここでは重要な"preferences"と"output"の箇所のみ解説したいと思います。
ユーザーがLINE Notifyのアクセストークンを入力できるようにします。
"preferences": {
    "type": "object",
    "properties": {
      "accessToken": {
        "x-input-type": "text",
        "type": "string",
        "x-title": {
          "en": "An access token of LINE Notify",
          "ja": "LINE Notify の アクセストークン"
        },
        "x-description": {
          "en": "you need an access token of LINE Notify to use it",
          "ja": "LINE Notify を使用するにはアクセストークンが必要です。"
        }
      }
    }
}
アクセストークンは文字列のため、"x-input-type"は"text", "type"は"string"にしています。
実際のアプリの画面では、以下のようになります。

次のピースに時刻を渡せるようにします。
"output": {
    "type": "object",
    "properties": {
      "correctTime": {
        "type": "string",
        "format": "time"
      }
    }
}
文字列で"00:00:00"の形式のため、"type"は"string","format"は"time"にしています。
"string"は、"format"を指定する必要があるので注意してください。詳細は、こちらをご参照ください。
次に Piece Funcを解説します。
// axiosの読み込み
const axios = require("axios");

exports.handler = async (event) => {
    if (event.call === 'lambda') {
      if (axios !== null) { }
      return;
    }

    // URL
    const url = "https://notify-api.line.me/api/notify";

    // LINE Notfyのアクセストークン
    const token = event["properties"]["preferences"]["accessToken"]

    // 1~12でランダムな数値
    let hour = Math.floor(Math.random() * 12 + 1);

    // 0~59でランダムな数値
    let minute = Math.floor(Math.random() * 60);

    // 文字列とゼロ埋め2桁に変換
    hour = hour.toString().padStart(2, "0");
    minute = minute.toString().padStart(2, "0");

    // 時間
    const time = `${hour}:${minute}:00`;

    // 通知メッセージ
    const message = `正解は、${hour}時${minute}分です`;

    // 次のPieceに渡すデータ
    let result;

    // API通信
    const doLineNotify = async () => {
        try {
            await axios.post(
                url,
                querystring.stringify({
                    message: message
                }),
                { headers: {
                    Authorization: `Bearer ${token}`,
                    "Content-Type": "application/x-www-form-urlencoded"
                  }
                }
            );

            result = {
                status: 200,
                body: {
                  correctTime: time
                }
            };

        } catch (error) {
            console.log("Error message: " + error.message);
        }
    };

    // 実行
    await doLineNotify();
    return result;
};
前回学んだ、LINE Notifyとランダム時刻を組み合わせて以下のことを実行しています。
下2項目は前回では触れていなかったので、念の為解説します。
// 通知メッセージ
const message = `正解は、${hour}時${minute}分です`;
24~25行目を変更しました。テストコードでは"test"にしていましたが、hourとminuteを使って文を作成しています。これで、LINEに正解時間を通知できます。
result = {
    status: 200,
    body: {
        correctTime: time
    }
};
次のPieceに渡せるようにresultを作成しています。correctTimeは、Piece JSONのoutputで指定したkey名と合わせる必要があるので注意してください。
また、プログラムの実行処理を上げるために少し修正しました。
if (event.call === 'lambda') {
    if (axios !== null) { }
    return;
}
5~8行目にコードを追加しました。
このように記載することでモジュールの読み込みが早くなります。詳細については、Riiiverのチュートリアルをご参照ください。
if (event.call === 'lambda') {
    if (xxxxxx !== null) { }
    return;
}基本コードが上記となり、xxxxxxの箇所を読み込んだモジュールに変更するだけとなります。今回であれば、const axios = require("axios");と読み込んでいるのでaxiosに差し替えれば問題ありません。
複数のモジュールを扱う場合はxxxxxxの箇所を差し替えたif (xxxxxx !== null) { }をモジュールの数だけ追加しましょう。
最後に、実際に時計の動作を動画に撮ってみました。簡単なものですが、ご参照ください。また、今回のiiideaは「時計の読み方をレッスン」で既にリリース済みです。興味ある方は実際にお試しください!
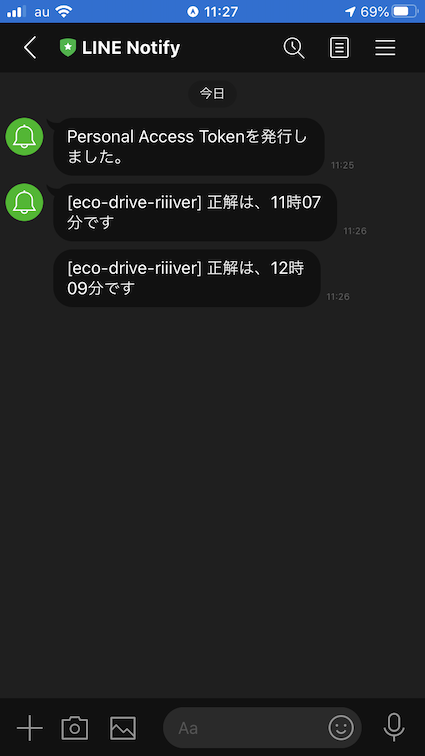
LINE側では、以下のように通知されます。
以上で、「Piece JSON」と「Piece Func」の解説は終わりです。
Piece JSONは前回作成したものから大きく変わっていませんが、今回のように一部を変えるだけでも新しいPieceを作成することができます。Piece Func は肝となる処理部分の動作が確認できれば、Lambda用に値の受け渡しや次のPieceへの出力部分を追加するだけです。
ご覧くださいましてありがとうございました。