![]()
Getting Started
更新 2020/11/01
Piece の作り方
どうも、こんにちは!JellyWareです。
Getting Started!! Riiiver tutorialの第13弾となります。
このシリーズは、Riiiverやプログラミングを学び、初心者の方でもEco-Drive Riiiverを活用したオリジナルアプリを理解して作れるようになることを目指します。

今回は、実際に今まで学んだものを活用して Piece を作成します。
※Piece の動作確認に関しては、次回行います。
目次
iiidea
改めてゴールとなる iiidea を確認しましょう。この iiidea の Service Piece を今回は作成します。
本サイトのトップページにもありますが、イメージはこちらのイラストです。

時計のボタンを押すだけで、天気 / 気温情報を Google スプレッドシートに記録できる仕組みです。
今までのコンテンツを学んだことを活かして、これを Eco-Drive Riiiver で行えるように Piece を1つ作成します。
以下、順に Trigger, Service, Action Piece を解説します。
Trigger Piece
既存の「ボタン押し」Piece を使用します。
Eco-Drive Riiiver のボタンを押すと iiidea を実行できます。

Service Piece
「PieceJSON」と「PieceFunc」を作成して、オリジナルの Piece を使用します。
具体的には、「OpenWeather」と「GAS」を利用します。
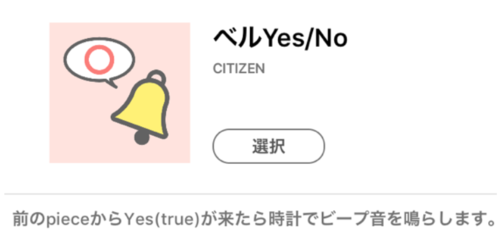
Action Piece
既存の「ベルYes/No」を使用します。
前の Piece からtrueを受けとると、Eco-Drive Riiiver がビープ音を鳴らします。
PieceJSON
それでは、まずは PieceJSON から作成します。
「title ~ categoryIds」「preferences」「output」の順に解説していきます。
title ~ categoryIds
まずは、最低限必要な箇所から作成しましょう。(第11弾でまとめています。)
{
	"title": {
		"en": "OpenWeather and GAS",
		"ja": "GAS を利用して天気を管理"
	},
	"version": "1.0.0",
	"sdkVersion": "1.0.0",
	"deviceId": "none",
	"vendorId": "none",
	"description": {
		"en": "Use Google Apps Script to send weather data to a spreadsheet. You will need to enter your own OpenWeather API key (openweathermap.org) and Google Sheets URL in order to use this Piece. Note:  This Piece currently includes only Japan locations.",
		"ja": "スプレッドシートに天気データを送るためにGoogle Appsのスクリプトを使います。このPieceを使うためには、お持ちのOpenWeatherのAPIキー(openweathermap.org)とGoogle SheetsのURLの入力が必要です。Note: このPieceは現在のところ、日本の地域限定です。"

	},
	"blockType": "service",
	"executor": "RBCCommonWebServiceExecutor",
	"serviceProxy": {
		"service": "riiiver_getting_started"
	},
	"osType": "none",
	"categoryIds": ["cat_0002"]
}
変更した箇所は、"title","description","serviceProxy","categoryIds"の4箇所のみです。
それぞれどう変更したかを順に解説します。
"title": {
    "en": "OpenWeather and GAS",
    "ja": "GAS を利用して天気を管理"
},
Piece の名前を変更しました。
今回は、「GAS」を使用しているのが分かるようにしています。
"description": {
    "en": "Use Google Apps Script to send weather data to a spreadsheet. You will need to enter your own OpenWeather API key (openweathermap.org) and Google Sheets URL in order to use this Piece. Note:  This Piece currently includes only Japan locations.",
    "ja": "スプレッドシートに天気データを送るためにGoogle Appsのスクリプトを使います。このPieceを使うためには、お持ちのOpenWeatherのAPIキー(openweathermap.org)とGoogle SheetsのURLの入力が必要になります。Note: このPieceは現在のところ、日本の地域限定となります。"
}
Piece の説明文を変更しました。
「ユーザーが必要なデータ」「対応している地域」などを記載しておくとユーザーは使いやすいです。
"serviceProxy": {
    "service": "riiiver_getting_started"
}
"service"のvalueを変更しました。「PieceFunc」となるファイル名です。
他に同じ名前のファイルが存在する場合、その名前は使用することができないので注意しましょう。(同じ名前の場合は、Piece を登録するタイミングで Riiiver が教えてくれます。)
"categoryIds": ["cat_0002"]
カテゴリーを変更しました。
"cat_0002"は、「Weather & Nature」を意味します。
その他のカテゴリーについては、こちらをご参照ください。
preferences
次に"preferences"を追加します。
復習ですが、"preferences"は「ユーザーがアプリから入力するデータ」を定義します。
今回の場合は「OpenWeatherのAPIキー」「 GASのURL」「 都道府県ID」となります。
第8弾,第10弾では OpenWeather を使用する際、都道府県名(英語表記)を使用していましたが、今回は都道府県IDを使用します。
(OpenWeatherが指定しているIDで、こちら にJSON形式でまとめられています。データ名は、「city.list.json.gz 」です。)
※後で説明するenum,enum-titleの関係性を分かりやすくするため、今回は「ID」を使用するように変更しました。
以下が作成した、"preferences"です。47都道府県を表示すると長いため一部割愛します。
"preferences": {
    "type": "object",
    "properties": {
        "opernWeatherMapAPIKey": {
            "x-input-type": "text",
            "type": "string",
            "x-title": {
                "en": "OpenWeather API Key",
                "ja": "OpenWeatherのAPIキー"
            },
            "x-description": {
                "en": "Input OpenWeather Map API key.",
                "ja": "OpenWeatherのAPIキーを入力してください"
            }
        },
        "gasURL": {
            "x-input-type": "text",
            "type": "string",
            "x-title": {
                "en": "Google Apps Script URL",
                "ja": "Google Apps Script の URL"
            },
            "x-description": {
                "en": "Input Google Apps Script URL.",
                "ja": "Google Apps ScriptのURLを入力してください"
            }
        },
        "prefecture": {
            "x-input-type": "drumroll",
            "type": "string",
            "x-title": {
                "en": "Location",
                "ja": "地域"
            },
            "x-description": {
                "en": "Select location from which you wish to extract weather data.",
                "ja": "天気データを知りたい地域を選択してください"
            },
            "enum": [
                "2130037",
                "2130656",
                ~
                "1860825",
                "1894616"
            ],
            "x-enum-titles": {
                "2130037": {
                    "en": "Hokkaido",
                    "ja": "北海道"
                },
                "2130656": {
                    "en": "Aomori",
                    "ja": "青森"
                },
                ~
                "1860825": {
                    "en": "Kagoshima",
                    "ja": "鹿児島"
                },
                "1894616": {
                    "en": "Okinawa",
                    "ja": "沖縄"
                }
            }
        }
    }
}
"properties"にユーザーから受け取る3種類のデータを"opernWeatherMapAPIKey","gasURL","prefecture"で指定しています。
まずは、「OpenWeatherのAPIキー」の箇所から確認します。
"opernWeatherMapAPIKey": {
    "x-input-type": "text",
    "type": "string",
    "x-title": {
        "en": "OpenWeather API Key",
        "ja": "OpenWeatherのAPIキー"
    },
    "x-description": {
        "en": "Input OpenWeather Map API key.",
        "ja": "OpenWeatherのAPIキーを入力してください"
    }
}
入力フォーマット("x-input-type")は、"text"を指定しています。
実際のアプリの画面では、以下のようになります。
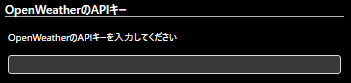
"x-title"がタイトルに、"x-description"が説明文となります。
次に「GASのURL」を確認します。
"gasURL": {
    "x-input-type": "text",
    "type": "string",
    "x-title": {
        "en": "Google Apps Script URL",
        "ja": "Google Apps Script の URL"
    },
    "x-description": {
        "en": "Input Google Apps Script URL.",
        "ja": "Google Apps ScriptのURLを入力してください"
    }
}
入力フォーマット("x-input-type")は、"text"を指定しています。
実際のアプリの画面では、以下のようになります。

"x-title"がタイトルに、"x-description"が説明文となります。
次に「都道府県ID」を確認します。
"prefecture": {
    "x-input-type": "drumroll",
    "type": "string",
    "x-title": {
        "en": "Location",
        "ja": "地域"
    },
    "x-description": {
        "en": "Select location from which you wish to extract weather data.",
        "ja": "天気データを知りたい地域を選択してください"
    },
    "enum": [
        "2130037",
        "2130656",
        ~
        "1860825",
        "1894616"
    ],
    "x-enum-titles": {
        "2130037": {
            "en": "Hokkaido",
            "ja": "北海道"
        },
        "2130656": {
            "en": "Aomori",
            "ja": "青森"
        },
        ~
        "1860825": {
            "en": "Kagoshima",
            "ja": "鹿児島"
        },
        "1894616": {
            "en": "Okinawa",
            "ja": "沖縄"
        }
    }
}
入力フォーマット("x-input-type")は、"drumroll"を指定しています。
実際のアプリの画面では、以下のようになります。
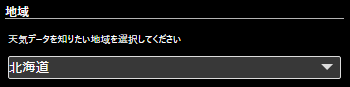
プルダウンメニューで、都道府県を1つだけ選べます。
"enum": [
    "2130037",
    "2130656",
    ~
    "1860825",
    "1894616"
]
プルダウンのメニューに表示させる値は、"enum"で指定します。型は配列です。
今回は、「都道府県ID」を指定しています。
また、今回のようにIDではなく、それに対応する都道府県名を表示させたい場合、
"x-enum-titels"を使用します。
"x-enum-titles": {
    "2130037": {
        "en": "Hokkaido",
        "ja": "北海道"
    },
    "2130656": {
        "en": "Aomori",
        "ja": "青森"
    },
    ~
    "1860825": {
        "en": "Kagoshima",
        "ja": "鹿児島"
    },
    "1894616": {
        "en": "Okinawa",
        "ja": "沖縄"
    }
}
"enum"で指定した各値に対して、オブジェクトで言語毎に値を指定します。
このように記述することで、表示される都道府県を選ぶと、それに対応するIDが自動で選ばれるようになります。
| 都道府県名 | ID |
|---|---|
| 北海道 | 2130037 |
| 青森 | 2130656 |
| 鹿児島 | 1860825 |
| 沖縄 | 1894616 |
上記の対応表を、"enum" "x-enum-titles"を用いて表しています。
以上で、"preferences"の解説は終わりです。
output
次に、"output"を追加します。
※今回は前の Piece から受け取るデータは無いため"input"は不要です。あくまで、Piece 間のデータの受け渡しについて定義する箇所なので、設定しない場合もあります。
"output"は「次の Piece に渡すデータ」を定義します。今回は、Piece の動作が成功したかどうかを受け渡したいため、「true」 もしくは「 false」のどちらかとなるboolean型を指定します。
以下が作成した"output"です。
"output": {
    "type": "object",
    "properties": {
        "successFlag": {
            "type": "boolean"
        }
    }
}
"properties"に、次の Piece に渡すデータの名前"successFlag"を指定しています。
"type"は"boolean"を指定しているため、データはtrueかfalseのみとなります。
完成
{
    "title": {
        "en": "OpenWeather and GAS",
        "ja": "GAS を利用して天気を管理"
    },
    "version": "1.0.0",
    "sdkVersion": "1.0.0",
    "deviceId": "none",
    "vendorId": "none",
    "description": {
        "en": "Use Google Apps Script to send weather data to a spreadsheet. You will need to enter your own OpenWeather API key (openweathermap.org) and Google Sheets URL in order to use this Piece. Note:  This Piece currently includes only Japan locations.",
        "ja": "スプレッドシートに天気データを送るためにGoogle Appsのスクリプトを使います。このPieceを使うためには、お持ちのOpenWeatherのAPIキー(openweathermap.org)とGoogle SheetsのURLの入力が必要になります。Note: このPieceは現在のところ、日本の地域限定となります。"

    },
    "blockType": "service",
    "executor": "RBCCommonWebServiceExecutor",
    "serviceProxy": {
        "service": "riiiver_getting_started"
    },
    "osType": "none",
    "categoryIds": ["cat_0002"],
    "preferences": {
        "type": "object",
        "properties": {
            "opernWeatherMapAPIKey": {
                "x-input-type": "text",
                "type": "string",
                "x-title": {
                    "en": "OpenWeather API Key",
                    "ja": "OpenWeatherのAPIキー"
                },
                "x-description": {
                    "en": "Input OpenWeather Map API key.",
                    "ja": "OpenWeatherのAPIキーを入力してください"
                }
            },
            "gasURL": {
                "x-input-type": "text",
                "type": "string",
                "x-title": {
                    "en": "Google Apps Script URL",
                    "ja": "Google Apps Script の URL"
                },
                "x-description": {
                    "en": "Input Google Apps Script URL.",
                    "ja": "Google Apps ScriptのURLを入力してください"
                }
            },
            "prefecture": {
                "x-input-type": "drumroll",
                "type": "string",
                "x-title": {
                    "en": "Location",
                    "ja": "地域"
                },
                "x-description": {
                    "en": "Select location from which you wish to extract weather data.",
                    "ja": "天気データを知りたい地域を選択してください"
                },
                "enum": [
                    "2130037",
                    "2130656",
                    ~
                    "1860825",
                    "1894616"
                ],
                "x-enum-titles": {
                    "2130037": {
                        "en": "Hokkaido",
                        "ja": "北海道"
                    },
                    "2130656": {
                        "en": "Aomori",
                        "ja": "青森"
                    },
                    ~
                    "1860825": {
                        "en": "Kagoshima",
                        "ja": "鹿児島"
                    },
                    "1894616": {
                        "en": "Okinawa",
                        "ja": "沖縄"
                    }
                }
            }
        }
    }
    "output": {
        "type": "object",
        "properties": {
            "successFlag": {
                "type": "boolean"
            }
        }
    }
}
最終的な PieceJSON がこちらとなります。割愛していないデータを参照されたい方はこちらにアップしたのでご確認お願いいたします。
PieceFunc
次に PieceFunc を作成します。と言っても、第10弾で作成したコードを Piece 用に整えるだけです。
以下が、そのコードとなります。
// axiosの読み込み
const axios = require("axios");

exports.handler = async (event) => {
  if (event.call === 'lambda') {
    if (axios !== null) { }
    return;
 }

  // openweathermapのURL
  const api = "http://api.openweathermap.org/data/2.5/weather";

  // eventから都道府県IDを取得
  const prefectureID = event["properties"]["preferences"]["prefecture"];

  // eventからAPIキーを取得
  const apiKey = event["properties"]["preferences"]["opernWeatherMapAPIKey"];

  // 最終URL(OpenWeather)
  const url = `${api}?APPID=${apiKey}&id=${prefectureID}&units=metric`;

  // OpenWeather
  const doOpenWeather = async () => {
    try {
      const result = await axios.get(url);

      return result["data"];
    } catch (error) {
      console.log(`Error message: ${error.message}`);
    }
  };

  // eventからGASのURLを取得
  const gasApi = event["properties"]["preferences"]["gasURL"];

  // 次のPieceに渡すデータ
  let response;

  const doGAS = async () => {
    // OpenWeatherから気温と天気を取得
    const openWeatherData = await doOpenWeather();

    try {
      // JSONデータから必要なデータを取得
      const temp = openWeatherData["main"]["temp"]; // 気温
      const weather = openWeatherData["weather"][0]["main"]; // 天気

      // 最終URLを作成
      const gasUrl = `${gasApi}?temp=${temp}&weather=${weather}`;

      await axios.get(gasUrl);

      response = {
        status: 200,
        body: {
          successFlag: true
        }
      };

    } catch(error) {
      console.log(`Error message: ${error.message}`);

      response = {
        status: 500,
        body: {
          successFlag: false
        }
      };
    }
  }

  await doGAS();
  return response;
};
変更した内容としては、大きく以下の3点です。
- 全体を1つの関数とする
eventから必要なデータを受け取る- 次の Piece に送るデータを作成する
まずは、全体を1つのアロー関数としています。
exports.handler = async (event) => {
    // 割愛
}
ここは定型としてこのように記述すれば問題ありません。
次に「eventから必要なデータを受け取る」について説明します。eventからは、ユーザーがアプリから入力したデータを受け取れます。詳しくは、12弾をご参照ください。
// eventから都道府県IDを取得
const prefectureID = event["properties"]["preferences"]["prefecture"];

// eventからAPIキーを取得
const apiKey = event["properties"]["preferences"]["opernWeatherMapAPIKey"];
// eventからGASのURLを取得
const gasApi = event["properties"]["preferences"]["gasURL"];
13〜17行目と33〜34行目を修正しました。
APIキーやURLの代わりに、eventの値を指定しています。こうすることで、ユーザーが入力した値を使ってPiece Funcを実行することができます。
使用するkey名は、PieceJSON の preferencesのpropertiesで設定したkey名となります。
次に「次の Piece に送るデータを作成する」について説明します。
// 次のPieceに渡すデータ
let response;
response = {
    status: 200,
    body: {
      successFlag: true
    }
}
response = {
    status: 500,
    body: {
      successFlag: false
    }
}
return response;
36〜37行目、56〜61行目、66〜71行目、76行目を追加しました。
次の Piece に渡すデータを作成しています。API通信に成功したら、status: 200 successFlag: trueで、失敗したら、status: 500 successFlag: falseとしています。
successFlagの箇所は、PieceJSON のoutputのpropertiesで設定したkey名と一致させる必要があるので注意してください。
そして、最後にresponseをreturnしています。
また、細かい修正ですが75行目も修正しています。
await doGAS();
doGAS()はasync関数のため、awaitを追加しています。
以上で変更した箇所の解説は終わりです。「Openweatherと通信」,「GASの実行」を行っていることには変わりありません。
※以下、2020年6月24日に追記
if (event.call === 'lambda') {
  if (axios !== null) { }
  return;
}Lambdaの動作を素早くするために、5~8行目にウォームアップコードを追記しました。詳細については、Riiiverのチュートリアルをご参照ください。
GAS
最後に受け皿となるGASを用意します。こちらは第10弾と全く同じです。
そのため、コードのみ記載しておきます。詳細については、10弾をご参照ください。
const doGet = (e) => {
    // URLクエリパラメータからデータを取得
    const temp = e.parameter.temp
    const weather = e.parameter.weather

    // 現状Activeになっているsheetを取得
    const sheet = SpreadsheetApp.getActiveSheet();

    // 日時を取得
    const date = new Date();

    // シートに取得したデータを追記
    sheet.appendRow([date, temp, weather]);
}
以上で、「PieceJSON」と「PieceFunc」の作成は終了です。また、今回必要な「GAS」の準備もできました。
今まで習ったことを利用して作成しています。不明な箇所がある場合は、コンテンツを見直しましょう。
また、今回紹介した Piece を応用し、他の Piece を作ってみるとより理解が深まると思います。
次回は、こちらの「Piece」が実際にちゃんと動くかテストをし、Riiiver にアップロードする方法を説明します。
ご覧くださりありがとうございました。