Inference Engineで顔検出
2020/05/28
「AI CORE XスターターキットとOpenVINO™ですぐに始めるディープラーニング推論」シリーズの7回目記事です。
このシリーズは、「ディープラーニングとは何か」から始まり、「各種ツールの使い方」「プログラミング基礎」「プログラミング応用・実践」までをステップバイステップでじっくり学び、自分で理解してオリジナルのAIアプリケーションが作れるようになることを目指しています。

第7回目は入力された画像の中から顔の位置を検出するディープラーニング推論を学びます。
目次
- 必要なファイル準備
- ディープラーニング推論実行
- コードと実行結果の解説
- 入力画像に出力結果を描画
- 複数の顔検出
必要なファイル準備
前回同様、推論を行う際に必要なファイル2種類を用意します。1つは推論の対象とする「入力画像」、もう1つは「モデルと重み」です。
入力画像
今回は顔を検出するので、顔を含む画像を用意します。前回はトリミングしましたが、今回はこちらのページの画像をそのまま使います。下の方にダウンロードボタンがあります。サイズはSを使用しました。
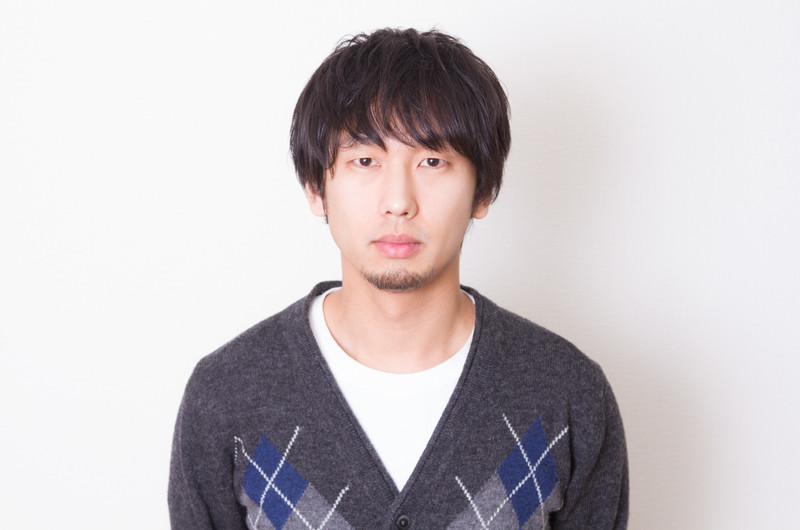
ファイル名はphoto.jpgに変更します。
前回同様、フォルダimageの中に入れて下さい。
モデルと重み
端末を開いてdownloader.pyのあるディレクトリへ移動します。
cd /opt/intel/openvino/deployment_tools/tools/model_downloader
今回はface-detection-retail-0005のダウンロードを実行します。
python3 downloader.py --name face-detection-retail-0005 --output_dir ~/workspace
これで、face-detection-retail-0005フォルダがダウンロードされました。
ディープラーニング推論実行
準備ができましたので、workspaceフォルダ直下で下記コードをコピペして作成し実行してみて下さい
# importimport cv2import numpy as npfrom openvino.inference_engine import IENetwork, IEPlugin# ターゲットデバイスの指定plugin =# モデルの読み込みnet =exec_net = plugin# 入出力データのキー取得input_blob =out_blob =# 画像読み込みframe = cv2# 入力データフォーマットへ変換img = cv2 # HeightとWidth変更img = img # HWC > CHWimg = np # CHW > BCHW# 推論実行out = exec_net# 出力から必要なデータのみ取り出しout =# 不要な次元を削減out = np# 中身を出力print(out)
このような結果が表示されたと思います
...
...の部分は、実際にはたくさんデータがあるけど省略しているという意味です。
それでは、コードや結果の詳細について見てゆきましょう。
コードと実行結果の解説
前回の最初のコードからの変更点は3箇所のみです
- モデルと重みのファイル名
- 入力画像のファイル名
- 入力データフォーマットの width x height サイズ
Inference Engine
Inference Engineの使い方は前回と全く同じです
- モジュール読み込み
- ターゲットデバイスの指定
- モデルの読み込み
- 推論実行
「モジュール読み込み」「ターゲットデバイスの指定」「推論実行」は全く同じです。
違いがあったのが「モデルの読み込み」です。
# 前回net =
# 今回net =
モデルの重みとファイル名をランドマーク回帰から顔検出に変更しています
その他のコード
「その他のコード」についても同じ構成です。
- 入出力データのキー取得
- 入出力データのフォーマット確認
- 入力データを整える
- 出力データを取り出す
「入出力データのキー取得」「出力データを取り出す」は全く同じです。
「入出力データのフォーマット確認」と「入力データを整える」について見てゆきましょう。
入出力データのフォーマット確認
今回のモデルについては、インテルのこちらのサイトに詳細が書かれています。
Inputsの項目には以下のように書いてあります。
Inputs
name: "input" , shape: [1x3x300x300] - An input image in the format [BxCxHxW], where:
B - batch size
C - number of channels
H - image height
W - image width
Expected color order - BGR.
前回との違いは1つだけ。HxW のサイズが 300x300 になっています。
次にOutputsの項目を見てみます
Outputs
The net outputs a blob with shape: [1, 1, N, 7], where N is the number of detected bounding boxes. For each detection, the description has the format: [image_id, label, conf, x_min, y_min, x_max, y_max], where:
image_id - ID of the image in the batch
label - predicted class ID
conf - confidence for the predicted class
(x_min, y_min) - coordinates of the top left bounding box corner
(x_max, y_max) - coordinates of the bottom right bounding box corner.
これは前回と結構違います。ざっくりまとめると
- 要素数 7 個のリストが N 個ある
- N は検出したバウンディングボックスの数
- 7 個の中身は [ image_id, label, conf, x_min, y_min, x_max, y_max ]
- image_id はbatchのID番号
- label は予測クラスID
- conf は顔検出の信頼度
- (x_min, y_min) はバウンディングボックスの左上の角座標
- (x_max, y_max) はバウンディングボックスの右下の角座標
「バウンディングボックス」とは顔の領域を推定した四角形の枠です。
これでフォーマットが分かりましたので、この情報を元に入出力データを処理します。
入力データを整える
変更箇所のみ書き出します。
まずは、入力画像のファイル名を photo_face.jpg から face.jpg に変更しています。
# 前回frame = cv2
# 今回frame = cv2
次に、Inputsで変更のあったように、HeightとWidthのサイズを48x48から300x300へ変更しています。
# 前回img = cv2 # HeightとWidth変更
# 今回img = cv2 # HeightとWidth変更
その他は前回と同じ処理です。
これで画像データimgは要求されたフォーマットになりました
出力データを取り出す
outの中身を取り出して表示しているのは前回と同じです
...
このままだと...で結果が全部見えないので、out[0]のみ表示してみて下さい
最後に print(out[0]) と追記するだけです。
実行すると、以下のように7つの要素を持ったリストが得られたと思います。
この値は以下の表のような内容を意味しています。
| image_id | label | conf | x_min | y_min | x_max | y_max |
|---|---|---|---|---|---|---|
| 0.0 | 1.0 | 1.0 | 0.41064453 | 0.18713379 | 0.5932617 | 0.53271484 |
左上座標が (0.41064453, 0.18713379) で、右上座標が (0.5932617, 0.53271484)のバウンディングボックスということが分かりました。これを使って長方形を描けば顔の領域を示すことが出来そうです。
入力画像に出力結果を描画
プログラムとしては、x_minはout[0][3]、y_minはout[0][4]、x_maxはout[0][5]、y_maxはout[0][6]で各数値を取得できますので、これを活用しましょう。
次のコードをコピペして実行してみて下さい。
# importimport cv2import numpy as npfrom openvino.inference_engine import IENetwork, IEPlugin# ターゲットデバイスの指定plugin =# モデルの読み込みnet =exec_net = plugin# 入出力データのキー取得input_blob =out_blob =# 画像読み込みframe = cv2# 入力データフォーマットへ変換img = cv2 # HeightとWidth変更img = img # HWC > CHWimg = np # CHW > BCHW# 推論実行out = exec_net# 出力から必要なデータのみ取り出しout =# 不要な次元を削減out = np# 中身を出力print(out)# バウンディングボックス座標を入力画像のスケールに変換xmin =ymin =xmax =ymax =# バウンディングボックス表示cv2# 画像表示cv2# キーが入力されるまで待つcv2# 終了処理cv2
次のような画像が出力されたかと思います。
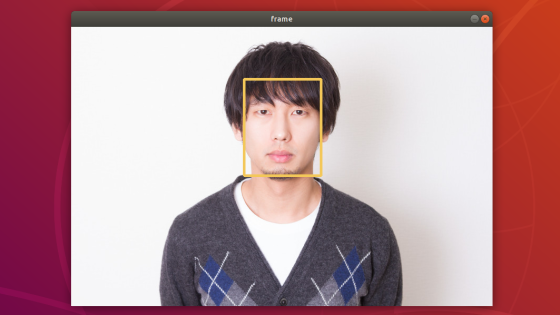
顔の領域に長方形(つまりバウンディングボックス)を表示できました!
最初のコードからの追加点は以下の部分のみです。
# バウンディングボックス座標を入力画像のスケールに変換xmin =ymin =xmax =ymax =# バウンディングボックス表示cv2# 画像表示cv2# キーが入力されるまで待つcv2# 終了処理cv2
前回同様、座標値は正規化されているため、frame.shape[1]とframe.shape[0]を使って、元の画像サイズの領域に変換しています。変換した座標値を使ってcv.rectangleを使って長方形を描いています。
複数の顔検出
先程は1つの顔だけでしたが、複数の顔が写っている画像の場合を考えてみましょう
こちらのページの画像を活用します。
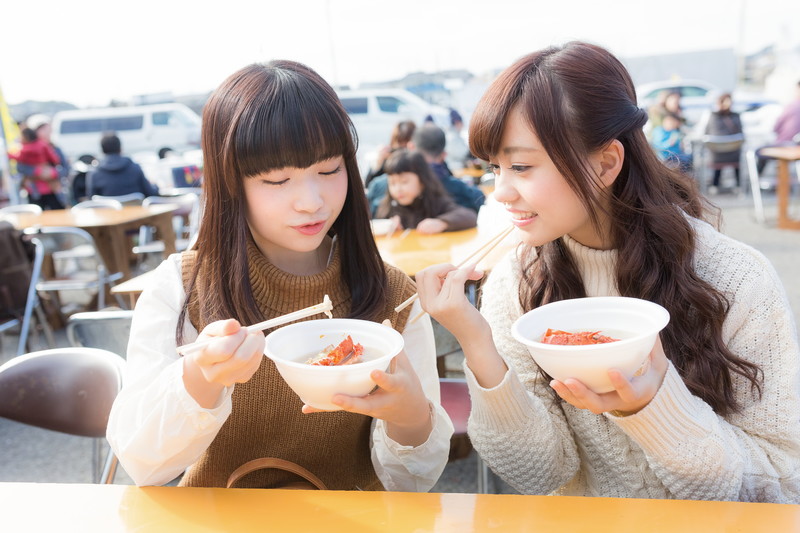
ファイル名はphoto2.jpgに変更しました。
バウンディングボックスを描画する前に数値で確認したいと思います。先頭から20行のリストの各数値を表示してみることとします。以下のコードをコピペして実行して下さい。
# importimport cv2import numpy as npfrom openvino.inference_engine import IENetwork, IEPlugin# ターゲットデバイスの指定plugin =# モデルの読み込みnet =exec_net = plugin# 入出力データのキー取得input_blob =out_blob =# 画像読み込みframe = cv2# 入力データフォーマットへ変換img = cv2 # HeightとWidth変更img = img # HWC > CHWimg = np # CHW > BCHW# 推論実行out = exec_net# 出力から必要なデータのみ取り出しout =# 不要な次元を削減out = np# 中身を20行だけ出力for i in :print()
変更箇所は入力画像のファイル名と最後の出力のみです。
以下のように表示されたかと思います。(見やすいように1部の改行を削除しています)
[ image_id, label, conf, x_min, y_min, x_max, y_max ]
列方向について、0列目から数えるものとします。
この結果から見てまず分かるのは、顔検出は14箇所で行われていそうだということです。
理由は、3列目~6列目のバウンディングボックス座標(x_min y_min x_max y_max)に着目すると、全て0.になっている行以外を数えると14行あるためです。
0列目のimage_idに着目すると、基本的には0ですが、顔検出できなくなった行で-1になっているようです。
1列目のlabelに着目すると、顔検出されている行では1.、それ以外では0.ということも分かります。
2列目のconfに着目すると、降順(大きい数値から順)に並んでいることが分かります。
先程の画像で検出して欲しい顔は2つですが、このまま表示すると余計な箇所までバウンディングボックスが表示されそうです。
再び2列目のconfに着目してみましょう。confは顔検出の信用度であり、1.0 に近いほど信用が高いことを表しています。最初の2行は0.999でほぼ 1.0 であるのに対し、次の行は0.121となっているのが分かります。どうやらこのconfに着目して、指定した数値以上のときのみバウンディングボックスを表示させれば良さそうです。
今回は 0.5 という数値にしてみましょう。ちなみに、このような数値のことを閾値(しきいち)と呼んでいます。
以上の内容を踏まえたコードがこちらです。コピペして実行してみて下さい
# importimport cv2import numpy as npfrom openvino.inference_engine import IENetwork, IEPlugin# ターゲットデバイスの指定plugin =# モデルの読み込みnet =exec_net = plugin# 入出力データのキー取得input_blob =out_blob =# 画像読み込みframe = cv2# 入力データフォーマットへ変換img = cv2 # HeightとWidth変更img = img # HWC > CHWimg = np # CHW > BCHW# 推論実行out = exec_net# 出力から必要なデータのみ取り出しout =# 不要な次元を削減out = np# 検出されたすべての顔領域に対して1つずつ処理for detection in out:# conf値の取得confidence =# バウンディングボックス座標を入力画像のスケールに変換xmin =ymin =xmax =ymax =# conf値が0.5より大きい場合のみバウンディングボックス表示if confidence > 0.5:# バウンディングボックス表示cv2# 画像表示cv2# キーが入力されるまで待つcv2# 終了処理cv2
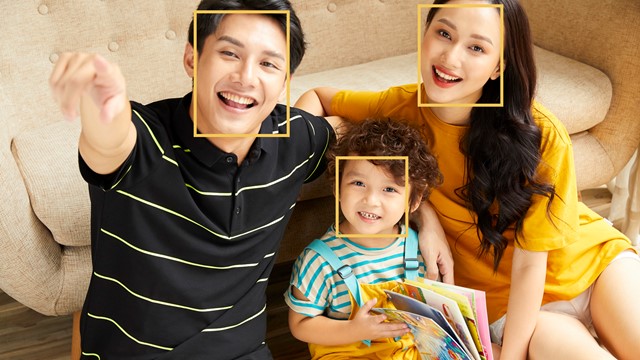
次のような画像が出力されたかと思います。
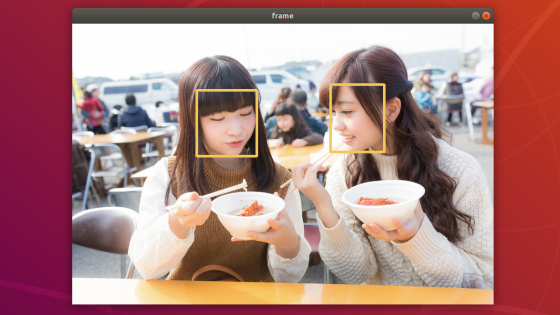
for inで1つずつ行データをdetectionに取り出し、confの値と閾値0.5を比較した結果、大きいときだけバウンディングボックスを表示するようにしています。
最初に使った画像はたまたま1つしか検出がありませんでしたが、他の画像では顔っぽい箇所全てが検出される場合がほとんどです。ただし、conf値に対して閾値を設けて判断すれば、必要な箇所にのみバウンディングボックスを描くことが出来ます。
ぜひ、他の画像や、閾値の変更など色々と試してみて下さい。次回は、カメラを使ったリアルタイム顔検出などを行います
以上、「Inference Engineで顔検出」でした。