2021/03/31
時計との日常を記録
どうも、こんにちは!JellyWareです。
Getting Started!! Riiiver tutorialの第20弾となります。
このシリーズは、Riiiverやプログラミングを学び、初心者の方でもEco-Drive Riiiverを活用したオリジナルアプリを理解して作れるようになることを目指します。

今回は時計との思い出を作るためのiiideaを考えてみました。スプレッドシートを活用して、日々の記録を時計で管理できるようにします。時計で時計との思い出を保存していきましょう。
どんなモノができる?
以下が完成品のイメージです。


Eco-Drive Riiiver をアレンジして、スプレッドシートと連携し日々の記録の作成と取得が行えます。時計との思い出作りに活用しましょう!
記録したいことをスマホアプリに入力し、時計のボタンを押すことでスプレッドシートに自動で記録されます。また、日付を指定してその日にしたことを取得しスマホに通知できます。
目次
OAuth認証
これまではAPIキーを使った簡単な認証でAPIを使用してきましたが、今回は「OAuth認証」と呼ばれる方法でAPIを使用します。
どちらもAPIを使う人が正しいユーザーかどうかを判定するものですが、使用できるAPIなどに違いがあります。
| 認証方法 | APIでできること | セキュリティ | 例 |
|---|---|---|---|
| APIキー | 一般的に公開されているデータの取得や検索 | 低 | twitterでツイートを検索する |
| OAuth認証 | サービスのエンドユーザーのみができる機能 | 高 | ユーザーの代わりにtwiiterでツイートを投稿する |
APIキーでの認証はお手軽な反面、セキュリティの面で不安なためできることが限られています。一方、OAuth認証は手間ではありますがセキュリティが高く、エンドユーザーとして機能を活用できるようになります。
詳しい使い方に関しては、実際にApps Script APIで試しながら確認していきましょう。
※OAuth認証についてより詳しく学びたい方は、こちらをご参照ください。分かりやすくまとめられています。
Google Apps Script API
Apps Script APIとは、Google Apps Script(以降、GASと略す)に関するGoogleのAPIです。GASを実行するだけではなく、GASのプロジェクトを作成したりすることができます。
前回はGASのプロジェクトを公開する形にしていましたが、今回はOAuth認証を通して実行するので、非公開の形でGASを実行できるようになります。
まずはどう使うのかを学びましょう。
OAuthの設定
今回はOAuth認証でAPIを使用します。そのための設定を行います。
まずは、Apps Script APIを有効化させます。18弾の記事を参考に、Google Cloud Platformのプロジェクトの作成とAPIの有効化を行ってください。有効化するAPIは、Apps Script APIにしてください。認証情報の作成は不要です。

APIを有効化できたら、次にOAuth認証の設定をします。
APIを有効化したら、APIとサービス > 認証情報をクリックします。

次に認証情報を作成 > OAuthクライアント IDをクリックします。

以下のように、各項目を選択・入力してください。
アプリケーションの種類:ウェブアプリケーション
名前:任意の名前
承認済みのJavaScript: http://localhost
承認済みのリダイレクトURI: http://localhost

最後に作成ボタンを押すと、OAuth認証で使用する情報を取得できるのでメモしておいてください。

これでOAuth認証の設定は終了です。次に公開します。APIとサービス > OAuth同意画面をクリックします。

アプリを公開をクリックすると確認画面が表示されるので、確認をクリックして完了です。

これでOAuth認証を使う設定ができました。OAuth認証自体はできていないので、まだAPIは使えません。
テスト用のGAS作成
次に、Apps Script APIの動作を確認するためのGASを作成します。スプレッドシートを新規で作成して、スクリプトエディタを立ち上げてください。
立ち上げたら、あらかじめ記載されているコードを削除して以下のコードに差し替えてください。
function test(param) {
  const sheet = SpreadsheetApp.getActive().getSheetByName("シート1");
  sheet.appendRow([new Date(), param]);

  return "成功";
}
「タイムスタンプ」と「受け取った値」をシートに追記して、成功という文字列を返すだけの簡単な関数です。コードの差し替えができたら、GASの設定を変更してApps Script APIから実行できるようにします。
プロジェクトの設定をクリックしてエディタから切り替えます。

一番下にあるプロジェクトを変更をクリックします。

すると、Google Cloud Platformのプロジェクト番号を入力するフォームが現れるので入力し、プロジェクトを設定ボタンを押します。

Google Cloud Platformのプロジェクト番号は、ホームのダッシュボードに記載されています。

プロジェクトを設定したら、最後にデプロイを行います。右上のデプロイボタンから新しいデプロイを選んでください。

左上の歯車マークから実行可能APIを選びます。

アクセスできるユーザーをGoogle アカウントを持つ全員に切り替えて、デプロイボタンをクリックすればOKです。

最後に表示されるデプロイIDを後で使用するのでメモしておいてください。

OAuthトークンの取得
次にOAuthトークンというのを入手します。glitchで作業することがあるので、項目として1つにまとめました。
まずは、以下のURLの{cliend_id}箇所を「Apps Script API のOAuth設定」で取得した「クライアントID」に差し替えてアクセスします。
https://accounts.google.com/o/oauth2/auth ?client_id={cliend_id} &redirect_uri=http://localhost &scope=https://www.googleapis.com/auth/spreadsheets&response_type=code&approval_prompt=force&access_type=offline
URLにアクセスすると、Googleアカウントを選ぶページが表示されます。スプレッドシートを作成したGoogleアカウントを選んでください。
大事なのはscopeというURLクエリパラーメータ部分です。使用するGoogleの機能を記載します。今回の場合こちらのドキュメントを参照し、スプレッドシートの編集を行えるようにしています。

次に詳細をクリックします。

すると、ページ下部が広がります。ページ下部の○○(安全ではないページ)に移動をクリックします。〇〇の箇所は、Google Cloud Platformのプロジェクト名になります。

権限の付与の許可を求められるので許可します。

許可ボタンを押します。

「このサイトにアクセスできません」となりますが、問題ありません。重要なのは最後のページのURLです。

?code=xxxxxxxxxxxx&scope=...となっているxxxxxxxxxxxxの箇所をメモしてください。これをAuthorization codeと言います。
次にglitchのプロジェクトを新規作成してください。作成したら、左下のTools > Terminalをクリックします。

新しく表示された黒い箇所に、以下をコピーアンドペーストしてEnterキーで実行します。ただし{client_id} {client_secret} {code}の箇所は以下の通りに差し替える必要があります。
{client_id}: OAuthの設定 で取得したclient_id{client_secret}: OAuthの設定 で取得したclient_secret{code}: 先ほど取得したAuthorization code
curl -d client_id={client_id} -d client_secret={client_secret} -d redirect_uri=http://localhost -d grant_type=authorization_code -d code={code} https://accounts.google.com/o/oauth2/token
実行すると、以下のように{}で囲まれたJSON形式のデータが出力されます。

大事なのはaccess_tokenのkeyに対応するvalueです。glitchの.envファイルを開きAdd a Variableボタンを押して、このvalueを追加します。

これでOAuthトークンの取得と準備は終了です。
Apps Script APIのテスト
これで準備ができたので、Apps Script APIのテストを行います。以下のソースコードをglitchで実行します。モジュールのrequest-promise、requestを追加してください。
3行目は、GASのスクリプトIDと差し替え忘れないよう注意してください。
const requestPromise = require("request-promise");

const scriptId = "xxxxxxxxxxxxxxxxxxxxx"; // GASのスクリプトIDと差し替える
const scriptAPI = `https://script.googleapis.com/v1/scripts/${scriptId}:run`;
const accessToken = process.env.access_token;

const sample = async () => {
    const data = 'test'

    const body = {
        "function": "test", // GASの関数
        "parameters": [ // 関数に渡す値
          data
        ]
    }

    const result = await requestPromise({
        "method": "POST",
        "uri": scriptAPI,
        "headers": {
          "Authorization": `Bearer ${accessToken}`,
          "Content-Type": "application/json"
        },
        "body": body,
        "json": true
    });

    console.log(result);
}

// 実行
sample();
以下のように結果が出力されれば成功です。GASが動作して、スプレッドシートにtestと追記されていきます。動作を止める場合はsample()を// sample()とコメントにしましょう。
{
    done: true,
    response: {
      '@type': 'type.googleapis.com/google.apps.script.v1.ExecutionResponse',
      result: 'スクリプトは動作しました'
    }
  }
それでは、コードの解説をしたいと思います。
const scriptId = "xxxxxxxxxxxxxxxxxxxxx"; // GASのスクリプトIDと差し替える
const scriptAPI = `https://script.googleapis.com/v1/scripts/${scriptId}:run`;
const accessToken = process.env.access_token;
GASで発行したID、Apps Script APIのURL、取得したアクセストークンの3つです。
Apps Script APIは、GASの関数を実行するAPIを使用しています。最後の:runとついているのが目印です。
const result = await requestPromise({
    "method": "POST",
    "uri": scriptAPI,
    "headers": {
      "Authorization": `Bearer ${accessToken}`,
      "Content-Type": "application/json"
    },
    "body": body,
    "json": true
});
この箇所が実際にAPIを実行するコードとなります。基本的にこのまま使用すれば問題ありません。
方式はPOSTで、使用するURLはGASから発行されたURL、ヘッダーに取得したアクセストークンを追加します。
実行するGASの関数や引数は、"body"で指定します。コードとしては以下の通りになります。引数となる"parameters"は配列になるので注意してください。
const body = {
    "function": "test", // GASの関数
    "parameters": [ // 関数に渡す値
      data
    ]
}
また、アクセストークンは期限があるのでエラーが発生した場合は、再取得してください。
iiidea
Apps Script APIのテスト動作が確認できたので、iiideaを作成していきます。順に Trigger, Service, Action Piece を解説します。
Trigger
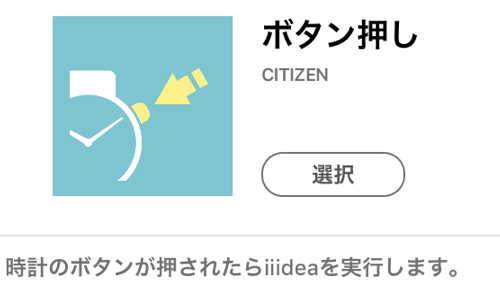
既存の「ボタン押し」を使用します。
Eco-Drive Riiiver のボタンを押すと iiidea を実行できます。

Service
今回新しく作成します。
Apps Script APIを使って、GASと連携させます。
Action
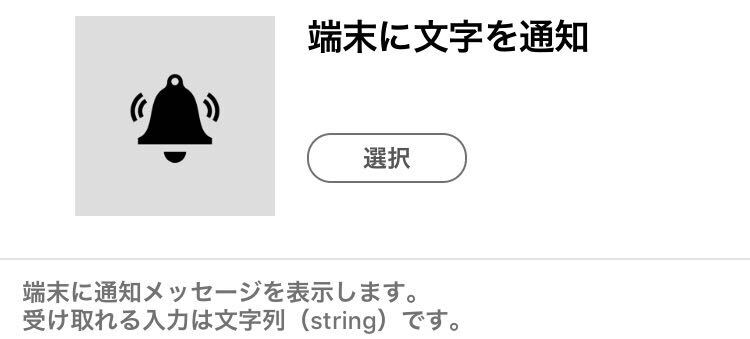
既存の「端末に文字を通知」を使用します。
Eco-Drive Riiiverと連携している端末に通知が届きます。

Piece JSON
Piece JSONについて解説します。
{
    "title": {
        "en": "Record daily with watch",
        "ja": "時計との日常を記録"
    },
    "version": "1.0.0",
    "sdkVersion": "1.0.0",
    "deviceId": "none",
    "vendorId": "none",
    "description": {
        "en": "",
        "ja": "Googleアカウントと連携します。作成したGoogle Apps Scriptを利用して、日々の出来事を記録します。また、日付を指定してその日何があったのかを取得できます。"
    },
    "blockType": "service",
    "executor": "RBCCommonWebServiceExecutor",
    "serviceProxy": {
        "service": "dailyRecord",
        "authType": [
            "oauth2"
        ]
    },
    "osType": "none",
    "categoryIds": ["cat_0005"],
    "preferences": {
        "type": "object",
        "x-field-order":["scriptId", "addingOrGetting", "record"],
        "properties": {
            "scriptId": {
                "x-input-type": "text",
                "type": "string",
                "x-title": {
                    "en": "Apps Script Deploy ID",
                    "ja": "Apps Scriptのデプロイ ID"
                },
                "x-description": {
                    "en": "Input your Apps Script Deploy ID, which is found in your Google Apps Script Deploy settings.",
                    "ja": "Apps ScriptのIDを入力してください。デプロイを管理からデプロイIDは確認できます。"
                }
            },
            "addingOrGetting": {
                "x-input-type": "radio",
                "type": "string",
                "x-title": {
                    "en": "Add or Get record ?",
                    "ja": "記録の追加・取得"
                },
                "x-description": {
                    "en": "Select to add or get record.",
                    "ja": "記録を追加するか取得するかを選んでください。"
                },
                "enum":["isAdding","isGetting"],
                "x-enum-titles":{
                    "isAdding":{
                      "en":"Add record",
                      "ja":"追加"
                    },
                    "isGetting":{
                      "en":"Get record",
                      "ja":"取得"
                    }
                },
                "default": "isAdding"
            },
            "record": {
                "x-input-type": "text",
                "type": "string",
                "x-title": {
                    "en": "daily record",
					"ja": "記録したいこと"
				},
				"x-description": {
                    "en": "Input daily record.",
					"ja": "記録したいことを入力してください"
				},
				"default": ""
            },
            "targetDaily": {
                "x-input-type":"calendar",
                "type":"string",
                "x-title":{
                    "ja":"取得日",
                    "en":"getting date"
                },
                "x-description":{
                    "en":"Please enter a getting date.",
                    "ja":"取得したい日を選んでください"
                },
                "format":"date"
            }
        }
    },
    "output": {
        "type": "object",
        "properties": {
            "responseText": {
                "type": "string",
                "format": "text"
            }
        }
    }
}
今回作成するPieceの要点となる、"serviceProxy", "authType", "preferences", "output"について解説します。
serviceProxy
OAuth認証を使用する場合、"serviceProxy"に"authType"を追加します。
"serviceProxy": {
    "service": "dailyRecord",
    "authType": [
        "oauth2"
    ]
}
また、Piece JSONなどをアップロードする際にoauth.jsonファイルも一緒にアップロードする必要があります。内容は以下の通りで、{clientId} {clientSecret}には、OAuth認証の設定で取得したクライアントIDとシークレットIDを記載します。
{
    "authType": ["oauth2"],
    "postType": "json",
    "oauth2": {
      "authorizedUrl": "https://accounts.google.com/o/oauth2/auth",
      "tokenUrl": "https://accounts.google.com/o/oauth2/token",
      "redirectUri": "https://builder.developer.riiiver.com/service_oauth/",
      "clientId": "{clientId}",
      "clientSecret": "{clientSecret}",
      "scope": "https://www.googleapis.com/auth/spreadsheets"
    }
  }
合わせて、Google Cloud Platformを少し修正します。プロジェクトのメニューからAPIとサービス > 認証情報をクリックします。

先ほど作成した認証情報を編集します。編集する場合は、鉛筆マークのアイコンをクリックします。

承認済みのリダイレクト URIをRiiiverの受け取り口であるhttps://builder.developer.riiiver.com/service_oauth/に変更します。

これで修正は終了です。
preferences
GASのデプロイID、追加する記録、取得する日付を入力、記録の追加か取得の選択をできるようにします。
"preferences": {
    "type": "object",
    "x-field-order":["scriptId", "addingOrGetting", "record"],
    "properties": {
        "scriptId": {
            "x-input-type": "text",
            "type": "string",
            "x-title": {
                "en": "Apps Script Deploy ID",
                "ja": "Apps Scriptのデプロイ ID"
            },
            "x-description": {
                "en": "Input your Apps Script Deploy ID, which is found in your Google Apps Script Deploy settings.",
                "ja": "Apps ScriptのIDを入力してください。デプロイを管理からデプロイIDは確認できます。"
            }
        },
        "addingOrGetting": {
            "x-input-type": "radio",
            "type": "string",
            "x-title": {
                "en": "Add or Get record ?",
                "ja": "記録の追加・取得"
            },
            "x-description": {
                "en": "Select to add or get record.",
                "ja": "記録を追加するか取得するかを選んでください。"
            },
            "enum":["isAdding","isGetting"],
            "x-enum-titles":{
                "isAdding":{
                  "en":"Add record",
                  "ja":"追加"
                },
                "isGetting":{
                  "en":"Get record",
                  "ja":"取得"
                }
            },
            "default": "isAdding"
        },
        "record": {
            "x-input-type": "text",
            "type": "string",
            "x-title": {
                "en": "daily record",
                "ja": "記録したいこと"
            },
            "x-description": {
                "en": "Input daily record.",
                "ja": "記録したいことを入力してください"
            },
            "default": ""
        },
        "targetDaily": {
            "x-input-type":"calendar",
            "type":"string",
            "x-title":{
                "ja":"取得日",
                "en":"getting date"
            },
            "x-description":{
                "en":"Please enter a getting date.",
                "ja":"取得したい日を選んでください"
            },
            "format":"date"
        }
    }
}
実際のアプリの画面では、以下のようになります。


output
次のPieceに文字列を渡せるようにします。
"output": {
    "type": "object",
    "properties": {
        "responseText": {
            "type": "string",
            "format": "text"
        }
    }
},
文字列のみを渡せるように、“type"は"string”,"format"は"text"にしています。
Piece Func
次に Piece Funcを解説します。コード自体は長いですが、Riiiver Developerサイトのサンプルコードのままです。サンプルコードはこちらに記載されています。
const requestPromise = require('request-promise');
exports.handler = async (event) => {
  if (event.call === 'lambda') {
    console.log('CALLED:LAMBDA');
    /* 外部モジュールを使う場合に記入してくだい。
       ex : if ( xxxx !== null ){} // xxxx : 生成したインスタンス */    if (requestPromise !== null) { }
    return;
  }

  let date = event.userData.date;
  let responseData;

  return requestPromise({
    'method': 'GET',
    'uri': 'https://app.riiiver.com/api/proxyBlockId', // ブロックID(Piece ID)を取得
    'headers': {
      'User-Agent': event.userData.userAgent,
      'Authorization': event.userData.credential,
    },
    'qs': {
      'serviceProxy': event.serviceProxy,
    },
    'resolveWithFullResponse': true,
  }).then(data => {
    if (data.statusCode !== 200) {
      responseData = { status: data.statusCode, body: { message: data.body } };
      return responseData;
    }
    console.log(`GET proxyBlockId responseData: ${data.body}`);
    const blockId = JSON.parse(data.body).blockId;
    return requestPromise({
      'method': 'GET',
      'uri': 'https://app.riiiver.com/api/clientAuthInfo', // Auth情報を取得
      'headers': {
        'User-Agent': event.userData.userAgent,
        'Authorization': event.userData.credential,
      },
      'qs': {
        'blockId': blockId,
        'uuid': event.userData.uuid
      },
      'resolveWithFullResponse': true,
    }).then(data => {
      if (data.statusCode !== 200) {
        console.log(`clientAuthInfo`);
        responseData = { status: data.statusCode, body: { message: data.body } };
        return responseData;
      }
      const body = JSON.parse(data.body);
      const expires_in = body.oauth2.expires_in;
      const now = Math.floor(new Date().getTime() / 1000);
      if (expires_in <= (now - (60 * 5))) {
        return requestPromise({
          'method': 'PUT',
          'uri': 'https://app.riiiver.com/api/updateOAuthToken', // トークンの期限が切れてたら更新
          'headers': {
            'User-Agent': event.userData.userAgent,
            'Authorization': event.userData.credential,
            'Content-Type': 'application/json',
          },
          'qs': {
            'blockId': blockId,
            'uuid': event.userData.uuid
          },
          'body': JSON.stringify({
            'refresh_token': body.oauth2.refresh_token
          }),
          'resolveWithFullResponse': true,
        }).then(data => {
          if (data.statusCode !== 201) {
            responseData = { status: data.statusCode, body: { message: data.body } };
            return responseData;
          }
          const access_token = JSON.parse(data.body).access_token;
          return dailyRecord(access_token, event, date).then(response => {
            responseData = response;
            return responseData;
          });
        });
      } else {
        const access_token = body.oauth2.access_token;
        return dailyRecord(access_token, event, date).then(response => {
          responseData = response;
          return responseData;
        });
      }
    })
    .catch(error => {
      responseData = { status: error.statusCode, body: { message: error.message } };
      return responseData;
    });
  }).catch(error => {
    responseData = { status: error.statusCode, body: { message: error.message } };
    return responseData;
  }).finally(() => {
    console.log(`getGoogleCalendarEvents response data: ${ JSON.stringify(responseData) }`);
  });
};

//////////////
// メイン処理
//////////////

const dailyRecord = async (access_token, event) => {
  // GASのIDとAPIのURL
  const scriptId = event["properties"]["preferences"]["scriptId"]; // piceから受け取る
  const scriptAPI = `https://script.googleapis.com/v1/scripts/${scriptId}:run`;
  const addingOrGetting = event["properties"]["preferences"]["addingOrGetting"]; // 追加: isAdding、取得:isGetting

  // 追加する記録と取得する日
  const record = event["properties"]["preferences"]["record"];
  let targetDaily = event["properties"]["preferences"]["targetDaily"];
  targetDaily = targetDaily.slice(-5);

  let body;

  if (addingOrGetting == 'isAdding') { // 追加の場合
    body = {
      "function": "record",
      "parameters": [
        record
      ]
    }
  } else { // 取得の場合
    body = {
      "function": "read",
      "parameters": [
        targetDaily
      ]
    }
  }

  let response;

  try {
    let result = await requestPromise({
      "method": "POST",
      "uri": scriptAPI,
      "headers": {
        "User-Agent": event["userData"]["userAgent"],
        "Authorization": `Bearer ${access_token}`,
        "Content-Type": "application/json"
      },
      "body": body,
      "json": true
    });

    console.log(result["response"]["result"]);

    response = {
      status: 200,
      body: {
        responseText: result["response"]["result"]
      }
    };
  } catch(error) {
    response = {
      status: 400,
      body: {
        responseText: 'エラーが発生しました'
      }
    };
  }

  return response;
}
今回は、少し複雑なコードになっています。以下が行っている内容です。iiideaの設定画面で記録するか取得するかをユーザーが選び、その選択によって動作を変えるようにしています。
- OAuth認証処理
bodyの作成(記録する場合)record関数を指定parameterに受け取った日時を指定
bodyの作成(取得する場合)read関数を指定parameterに受け取った日時を指定
- Apps Script APIの実行
まず、98行目まではサンプルコードの通りです。ここでは、GoogleのOAuth認証処理が行われています。ほとんどコードを変える必要もないので詳しい解説は行いません。
変えたところは、75,81行目の関数名をdailyRecordにしただけです。それではこの関数について解説します。
// GASのIDとAPIのURL
const scriptId = event["properties"]["preferences"]["scriptId"]; // piceから受け取る
const scriptAPI = `https://script.googleapis.com/v1/scripts/${scriptId}:run`;
const addingOrGetting = event["properties"]["preferences"]["addingOrGetting"]; // 追加: isAdding、取得:isGetting

// 追加する記録と取得する日
const record = event["properties"]["preferences"]["record"];
let targetDaily = event["properties"]["preferences"]["targetDaily"];
targetDaily = targetDaily.slice(-5);
まずは、必要なデータを取得しています。
addingOrGettingで、記録の作成か取得のどちらを行うかを判定します。また、取得する日付はフォーマットを変更しています。2020-04-01という形式から04-01と月日だけになるようにしています。
let body;

if (addingOrGetting == 'isAdding') { // 追加の場合
    body = {
      "function": "record",
      "parameters": [
        record
      ]
    }
} else { // 取得の場合
    body = {
      "function": "read",
      "parameters": [
        targetDaily
      ]
    }
}
addingOrGettingがisAddingの場合はrecord関数を、そうでない場合はread関数を実行するようにbodyパラメーターを作成しています。GAS側の関数については、次に解説します。
let response;

try {
    let result = await requestPromise({
      "method": "POST",
      "uri": scriptAPI,
      "headers": {
        "Authorization": `Bearer ${access_token}`,
        "Content-Type": "application/json"
      },
      "body": body,
      "json": true
    });

    console.log(result["response"]["result"]);

    response = {
      status: 200,
      body: {
        responseText: result["response"]["result"]
      }
    };
} catch(error) {
    response = {
      status: 400,
      body: {
        responseText: 'エラーが発生しました'
      }
    };
}

return response;
PieceFuncの最後の処理として、Apps Script APIを実行します。
result["response"]["result"]で、GASから返された値だけを抜き出すことができます。
GAS
最後にGASについて解説します。
const sheet = SpreadsheetApp.getActive().getSheetByName("シート1");

function record(dialy) {
  const date = new Date();
  let month = date.getMonth() + 1
  month = `0${month}`.slice(-2);
  let day = date.getDate();
  day = `0${day}`.slice(-2);
  const today = `${month}-${day}`;
  let lastDate;
  try {
    lastDate = sheet.getRange(sheet.getLastRow(), 1).getDisplayValue();
  } catch(e) {
    lastDate = sheet.getRange(1, 1).getDisplayValue();
  }

  if (today !== lastDate) {
    sheet.appendRow([today, dialy]);
  } else {
    const lastColmun = sheet.getRange(sheet.getLastRow(), 1).getNextDataCell(SpreadsheetApp.Direction.NEXT).getColumn();
    sheet.getRange(sheet.getLastRow(), lastColmun + 1).setValue(dialy);
  }

  return '追加に成功';
}

function read(date) {
  const targetDate = date.slice(-5);
  const dateList = sheet.getRange(1, 1, sheet.getLastRow()).getDisplayValues();

  let result;

  try {
    const dateIndex = dateList.findIndex( date => date[0] === targetDate);
    const dateColumn = dateIndex + 1;
    const lastColmun = sheet.getRange(dateColumn, 1).getNextDataCell(SpreadsheetApp.Direction.NEXT).getColumn();
    const dialyRecord = sheet.getRange(dateColumn, 1, 1, lastColmun).getValues()[0];
    dialyRecord.shift();

    console.log(dialyRecord);

    result = `${targetDate}にしたことは、${dialyRecord.join(' ')}です`;
  } catch(e) {
    result = `${targetDate}にしたことは、何もありません`;
  }

  return result;
}
record、記録をシートから読み取るreadの2種類の関数を作成しました。function record(dialy) {
const date = new Date();
let month = date.getMonth() + 1
month = `0${month}`.slice(-2);
let day = date.getDate();
day = `0${day}`.slice(-2);
const today = `${month}-${day}`;
let lastDate;
try {
  lastDate = sheet.getRange(sheet.getLastRow(), 1).getDisplayValue();
} catch(e) {
  lastDate = sheet.getRange(1, 1).getDisplayValue();
}

if (today !== lastDate) {
  sheet.appendRow([today, dialy]);
} else {
  const lastColmun = sheet.getRange(sheet.getLastRow(), 1).getNextDataCell(SpreadsheetApp.Direction.NEXT).getColumn();
  sheet.getRange(sheet.getLastRow(), lastColmun + 1).setValue(dialy);
}
return '追加に成功';
}
record関数は「日付」と「引数」をシートに追加する関数です。
const date = new Date();
let month = date.getMonth() + 1
month = `0${month}`.slice(-2);
let day = date.getDate();
day = `0${day}`.slice(-2);
const today = `${month}-${day}`;
日付は2020-04-01という、ハイフン区切りの表示形式に変更しています。
try {
lastDate = sheet.getRange(sheet.getLastRow(), 1).getDisplayValue();
} catch(e) {
lastDate = sheet.getRange(1, 1).getDisplayValue();
}
if (today !== lastDate) {
sheet.appendRow([today, dialy]);
} else {
const lastColmun = sheet.getRange(sheet.getLastRow(), 1).getNextDataCell(SpreadsheetApp.Direction.NEXT).getColumn();
sheet.getRange(sheet.getLastRow(), lastColmun + 1).setValue(dialy);
}
最終行の日付を取得してtodayと一致するかどうか判定しています。もし一致する場合は、その日に既に何か記録していることになります。
初回時のみ最終行が存在しないのでtry...catchでエラー回避をしています。
GASの関数については、以下を参照ください。
getRange:シートのセルを指定することができます。getRange(行, 列)という風に使います。getLastRow: シートの最終行を取得します。getDisplayValue:セル上に記載されている通りの値を取得できます。日付などのフォーマットによっては、セルの見た目通りにならない時があるので注意してください。setValue: 指定したセルに値を追加します。getRange関数と組み合わせて使います。
また、複数の関数を活用して
sheet.getRange(sheet.getLastRow(), 1).getNextDataCell(SpreadsheetApp.Direction.NEXT).getColumn();で指定した行の最終列を取得できます。
function read(date) {
  const targetDate = date.slice(-5);
  const dateList = sheet.getRange(1, 1, sheet.getLastRow()).getDisplayValues();

  let result;

  try {
    const dateIndex = dateList.findIndex( date => date[0] === targetDate);
    const dateColumn = dateIndex + 1;
    const lastColmun = sheet.getRange(dateColumn, 1).getNextDataCell(SpreadsheetApp.Direction.NEXT).getColumn();
    const dialyRecord = sheet.getRange(dateColumn, 1, 1, lastColmun).getValues()[0];
    dialyRecord.shift();

    result = `${targetDate}にしたことは、${dialyRecord.join(' ')}です`;
  } catch(e) {
    result = `${targetDate}にしたことは、何もありません`;
  }

  return result;
}
引数として受け取った日付で検索して、記録した内容を返すようにしています。
getValues関数を使うことで複数のセルの値を取得できます。[[test],[test2]]のように、配列の中に配列ができる形式となるので注意が必要です。
また、人によってはタイムゾーンがずれている場合があります。GASでのタイムゾーンの変更方法は以下の通りになります。
歯車マークをクリックして「プロジェクトの設定」を開きます。「appsscript.json」マニフェスト ファイルをエディタで表示するにチェックマークをつけます。

チェックマークをつけると、appsscript.jsonを編集できるようになります。

このファイルの中身を以下に挿し替えることで、タイムゾーンを日本に変更できます。全体を変更していますが、変更箇所は"timeZone"のみです。
{
  "timeZone": "Asia/Tokyo",
  "dependencies": {
  },
  "exceptionLogging": "STACKDRIVER",
  "runtimeVersion": "V8"
}
最後に、実際の動作を見てみます。以下のようにスマートフォンアプリで入力して時計のボタンを押しiiideaを実行すると、通知が届きます。


時計のボタンを押すという一手間が、より時計との思い出を印象深くしてくれるように感じました。
今回は、OAuth認証を使ったGoogle APIとの連携方法を学びました。是非、他のグーグルサービスとRiiiverを連携させてみてください。
ご覧くださいましてありがとうございました。
