![]()
Getting Started
![]()
Getting Started
2020/03/04
どうも、こんにちは!JellyWareです。
Getting Started!! Riiiver tutorialの第19弾となります。
このシリーズは、Riiiverやプログラミングを学び、初心者の方でもEco-Drive Riiiverを活用したオリジナルアプリを理解して作れるようになることを目指します。
ドラえもんに出てくるスケジュール時計※を見て、Eco-Drive Riiiverでも予定を管理できないか試してみました。腕時計がロボットになるわけではありませんが、グーグルカレンダーと連携することで予定の取得と変更が可能になりました。
※1日の予定を書いた紙を前面の挿入口に入れると、その通りの命令をしてくれる道具。天候などが悪くても確実に守らせ、逃げても追いかけてくる。
以下が完成品のイメージです。


Eco-Drive Riiiver をアレンジして、グーグルカレンダーと連携し予定の作成と取得が行えます。時計でスケジュールを管理して、毎日の予定を順調にこなしていきましょう。
前回、スプレッドシートと連携したように今回もGoogle Cloud Platformを活用します。Google Cloud Platformの登録方法などは、前回の記事をご参照ください。有効化するAPIは、Google Sheets APIではなく、Google Calendar APIにしてください。
また、モジュールとしてnode-google-calendarを使用します。
前回同様、glitchでテストを行います。
glitchのプロジェクト作成とカレンダーの準備をします。
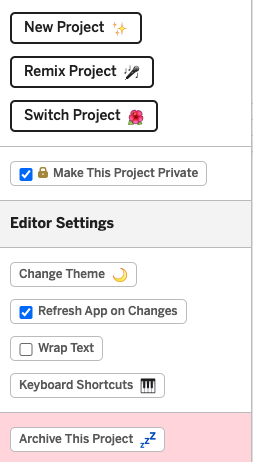
認証情報を使用するのでMake This Project Privateにチェックを入れます。
次に、認証に必要な情報を.envに書き込んでいきます。.env内に記載されている内容は、プロジェクト作成者本人しか確認することができません。

まずは.envを開いてSECRETとMADE_WITHを、それぞれprivate_keyとclient_idに書き換えます。
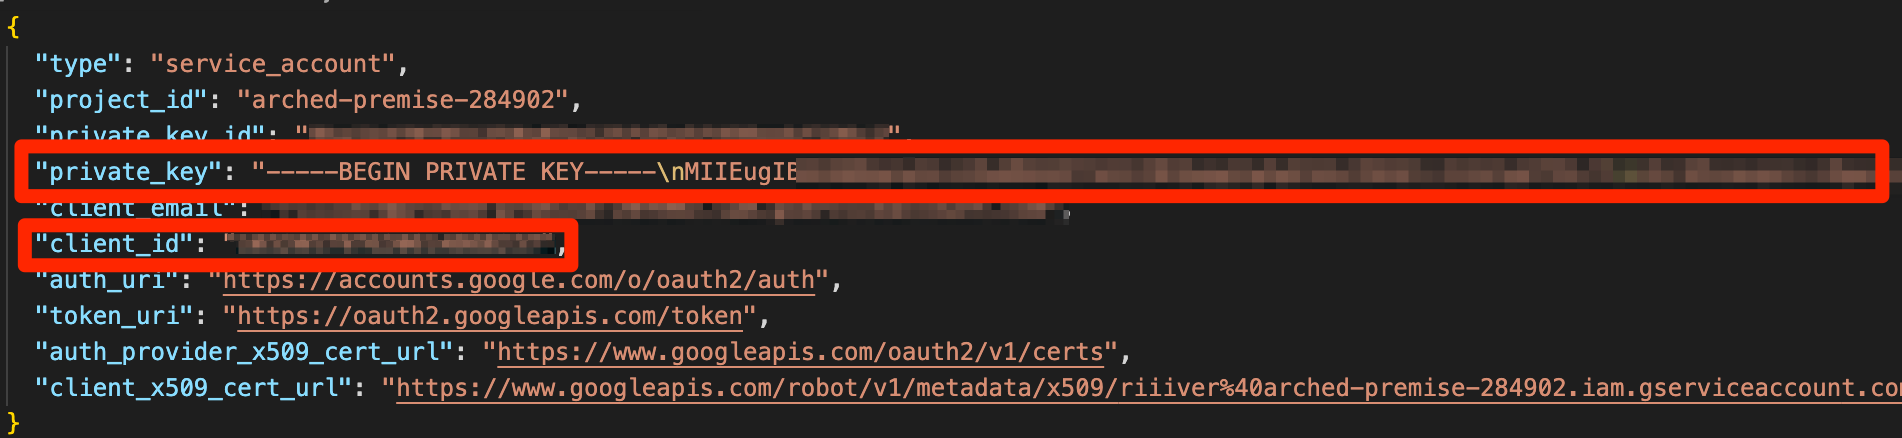
Variable Valueには、ダウンロードしたJSONファイルに記載されている値を記載してください。
最後にnode-google-calendarをモジュールを追加します。
これでglitch側の準備はOKです。次にカレンダー側の準備を行います。まずは、連携するカレンダーを開いてください。
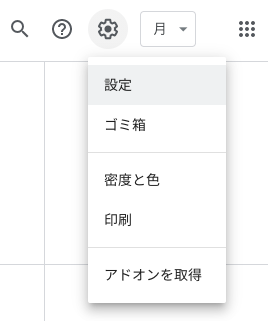
右上の歯車マーク > 設定の順にクリックします。設定ページが開きます。
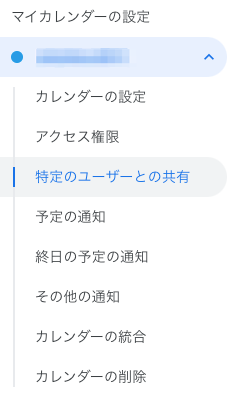
連携させたいカレンダーをクリックすると、設定項目が表示されます。特定のユーザーとの共有をクリックします。
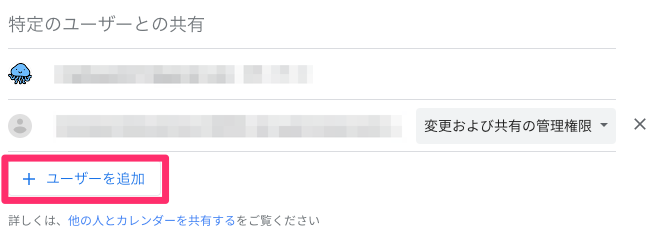
ユーザーを追加をクリックします。
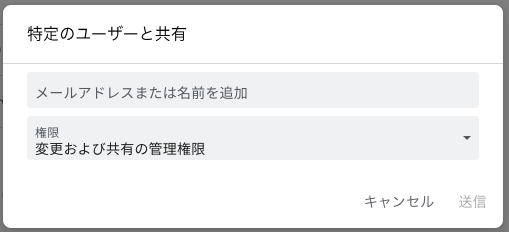
ここに、ダウンロードしたJSONデータに記載されているclient_emailのアドレスを追加します。権限は変更および共有の管理権限とします。
これで準備OKです。
スプレッドシート同様、カレンダーでも認証処理を行う必要があります。スプレッドシートとは異なり、関数は使用しません。
const Calendar = require("node-google-calendar");

const key = process.env.private_key.replace(/\\n/g, '\n');
const serviceAcctId = process.env.client_id;

const config = {
    key: key,
    serviceAcctId: serviceAcctId,
    timezone: "UTC+09:00" // 日本時間
}

const calendar = new Calendar(config);
読み込んだモジュールとGCPからダウンロードした情報を使用します。また、時間帯として日本時間を指定する必要があります。
次は予定の取得を行います。連携するGoogleアカウントのGmailアドレスをカレンダーIDとして使用します。
const Calendar = require("node-google-calendar");

const key = process.env.private_key.replace(/\\n/g, '\n');
const serviceAcctId = process.env.client_id;

const config = {
    key: key,
    serviceAcctId: serviceAcctId,
    timezone: "UTC+09:00" // 日本時間
}

const calendar = new Calendar(config);

const calendarId = "xxxxxxxxx@gmail.com"; // Gmailアドレスに差し替える

// 取得する対象期間
const timeMin = "2020-09-20T06:00:00+09:00";
const timeMax = "2020-09-21T06:00:00+09:00";

const params = {
    timeMin: timeMin,
    timeMax: timeMax
}

const getEvent = async () =>{
  const result = await calendar.Events.list(calendarId, params);
  console.log(result);
}
getEvent();
認証処理までは同じです。
const result = await calendar.Events.list(calendarId, params);
Events.list関数を使って、予定を取得します。非同期処理なのでawaitを活用しています。引数には、「カレンダーID」と「パラメーター」の2つを渡します。
// 取得する対象期間
const timeMin = "2020-09-20T06:00:00+09:00";
const timeMax = "2020-09-21T06:00:00+09:00";

const params = {
    timeMin: timeMin,
    timeMax: timeMax
}
今回、パラメーターとして「取得する期間」を指定しています。日付のフォーマットは「世界協定時 + 9時間」とする必要があるので注意してください。
[
  {
    kind: 'calendar#event',
    etag: '"0000000000000000"',
    id: 'xxxxxxxxxxxxxxxxxxxxxxxxxx',
    status: 'confirmed',
    htmlLink: 'https://www.google.com/calendar/event?eid=xxxxxxxxxxxxxxxxxxxxxxxxx',
    created: '2020-09-11T01:55:55.000Z',
    updated: '2020-09-11T01:55:55.483Z',
    summary: 'test',
    creator: { email: 'xxxxxxxxxxx@gmail' },
    organizer: { email: 'xxxxxxxx@gmail.com', self: true },
    start: { dateTime: '2020-09-20T06:00:00+09:00', timeZone: 'Asia/Tokyo' },
    end: { dateTime: '2020-09-20T06:30:00+09:00', timeZone: 'Asia/Tokyo' },
    iCalUID: 'xxxxxxxxxxxxxxxxxxxxxx@google.com',
    sequence: 0,
    reminders: { useDefault: true }
  }
]
取得できると、このように配列で値が返ってきます。それぞれの予定は、オブジェクト形式で情報がまとめられています。
次に予定の作成です。
const Calendar = require("node-google-calendar");

const key = process.env.private_key.replace(/\\n/g, '\n');
const serviceAcctId = process.env.client_id;

const config = {
    key: key,
    serviceAcctId: serviceAcctId,
    timezone: "UTC+09:00" // 日本時間
}

const calendar = new Calendar(config);

const calendarId = "xxxxxxxxx@gmail.com"; // 使用するGmailアドレスに差し替える

// 開始時間、終了時間、件名、説明
const startTime = "2020-09-21T06:00:00+09:00";
const endTime = "2020-09-21T06:30:00+09:00";
const summary = "test";
const description = "testで登録";

const eventParam = {
  "start": {
    "dateTime": startTime
  },
  "end"  : {
    "dateTime": endTime
  },
  "summary": summary,
  "description": description,
};

const addEvent = async () => {
  await calendar.Events.insert(calendarId, eventParam);
}
addEvent();
こちらも認証処理まで同じです。
await calendar.Events.insert(calendarId, eventParam);
Events.insert関数を使って、予定を取得します。非同期処理なのでawaitを活用しています。引数には、「カレンダーID」と「パラメーター」の2つを渡します。
const startTime = "2020-09-21T06:00:00+09:00";
const endTime = "2020-09-21T06:30:00+09:00";
const summary = "test";
const description = "testで登録";

const eventParam = {
  "start": {
    "dateTime": startTime
  },
  "end"  : {
    "dateTime": endTime
  },
  "summary": summary,
  "description": description,
};
今回、パラメーターとして「開始時間」「終了時間」「件名」「説明」を指定しています。日付のフォーマットは「世界協定時 + 9時間」とするのは同じです。
予定の取得、作成で他に使えるパラメーターは、Google Calendar APIのドキュメントをご参照ください。
上記では直接日付を指定していましたが、new Dateを使って現在の時間に合わせて実行できるようにします。フォーマットを合わせたりする上で少し工夫が必要です。
まずは取得からです。現在の時間から8時間後までの予定を取得できるようにします。
const Calendar = require("node-google-calendar");

const key = process.env.private_key.replace(/\\n/g, '\n');
const serviceAcctId = process.env.client_id;

const config = {
    key: key,
    serviceAcctId: serviceAcctId,
    timezone: "UTC+09:00" // 日本時間
}

const calendar = new Calendar(config);

const calendarId = "xxxxxxxxx@gmail.com"; // Gmailアドレスに差し替える

// 現在時間
const now = new Date();
now.setHours(now.getHours() + 9);// 日本時間に変換

// 取得する対象期間
let timeMin = now // 最小時間
timeMin = timeMin.toJSON().slice(0, -5) + '+09:00'; // フォーマット変更

let timeMax = now; // 最大時間
timeMax.setHours(timeMax.getHours() + 8); // さらに8時間追加
timeMax = timeMax.toJSON().slice(0, -5) + '+09:00'; // フォーマット変更

const params = {
    timeMin: timeMin,
    timeMax: timeMax
}

const getEvent = async () =>{
  const result = await calendar.Events.list(calendarId, params);
  console.log(result);
}
getEvent();
現在時間の取得の追加、取得する対象期間のコードを変更しました。
// 現在時間
const now = new Date();
now.setHours(now.getHours() + 9);// 日本時間に変換
まずは、現在時間を取得し日本時間に変換しています。
let timeMin = now // 最小時間
timeMin = `${timeMin.toJSON().slice(0, -5)}+09:00`; // フォーマット変更
現在時間をtimeMinとし、フォーマットを変更しています。
new Date()で取得した値の形式は、文字列ではないのでtoJSON()で文字列に変換しています。また、ミリセコンドまで表記されているのでslice()を使用して削除しています。そして、+09:00をつけてフォーマットを整えています。
以下がフォーマットの変遷です。
2020-09-11T12:58:26.853Z
文字列に変換
2020-09-11T12:58:26
後ろの5桁を削除
2020-09-11T12:58:26+09:00
+09:00を追加
timeMax.setHours(timeMax.getHours() + 8); // さらに8時間追加
あとは、最大時間ですが8時間分追加するだけです。
次に予定の作成です。
const Calendar = require("node-google-calendar");

const key = process.env.private_key.replace(/\\n/g, '\n');
const serviceAcctId = process.env.client_id;

const config = {
    key: key,
    serviceAcctId: serviceAcctId,
    timezone: "UTC+09:00" // 日本時間
}

const calendar = new Calendar(config);

const calendarId = "xxxxxxxxx@gmail.com"; // 使用するGmailアドレスに差し替える

// 現在時間
const now = new Date();
now.setHours(now.getHours() + 9);// 日本時間に変換

// 開始時間
let eventStartTime = [6, 0];

let startTime = now;
startTime.setHours(eventStartTime[0]);
startTime.setMinutes(eventStartTime[1]);
startTime = `${startTime.toJSON().slice(0, -5)}+09:00`;

// 終了時間
let eventEndTime = [6, 30];

let endTime = now;
endTime.setHours(eventEndTime[0]);
endTime.setMinutes(eventEndTime[1]);
endTime = `${endTime.toJSON().slice(0, -5)}+09:00`;

// 件名、説明
const summary = "test";
const description = "";

const eventParam = {
  "start": {
    "dateTime": startTime
  },
  "end"  : {
    "dateTime": endTime
  },
  "summary": summary,
  "description": description,
};

const addEvent = async () => {
  await calendar.Events.insert(calendarId, eventParam);
}
addEvent();
現在時間の取得の追加、開始時間と終了時間のコードを変更しました。
// 終了時間
let eventEndTime = [6, 30];

// 終了時間
let eventEndTime = [6, 30];
Riiiverの仕様に合わせて、時間と分を配列で表しています。[時間, 分]と表記します。
let startTime = now;
startTime.setHours(eventStartTime[0]);
startTime.setMinutes(eventStartTime[1]);
startTime = `${startTime.toJSON().slice(0, -5)}+09:00`;
setHoursを使って、時間と分をそれぞれ設定し、同じようにフォーマットを変更しています。
順に Trigger, Service, Action Piece を解説します。
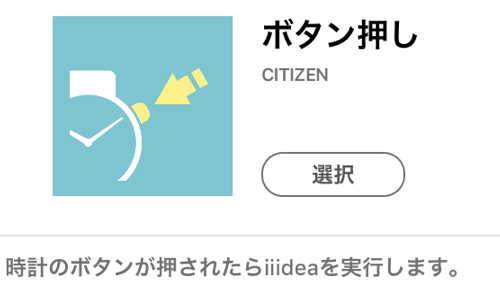
既存の「ボタン押し」を使用します。
Eco-Drive Riiiver のボタンを押すと iiidea を実行できます。
今回新しく作成します。
Google Calendar APIを使って、カレンダーと連携させます。
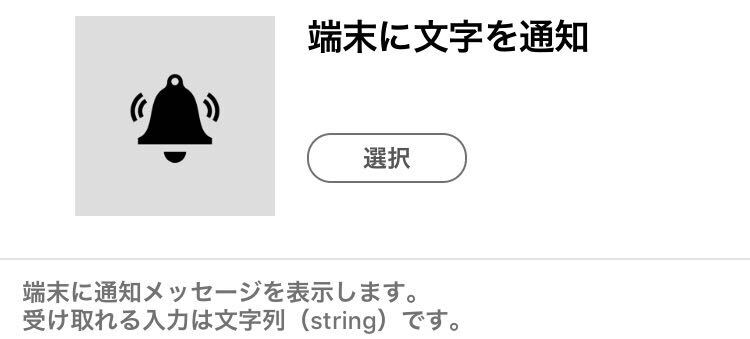
既存の「端末に文字を通知」を使用します。
Eco-Drive Riiiverと連携している端末に通知が届きます。
Piece JSONについて解説します。
{
    "title": {
        "en": "Schedule management by watch",
        "ja": "時計でスケジュール管理"
    },
    "version": "1.0.0",
    "sdkVersion": "1.0.0",
    "deviceId": "none",
    "vendorId": "none",
    "description": {
        "en": "You can add the latest appointment title and appointment by linking with Google Calendar. To use it, you need to share your calendar with 'riiiver@arched-premise-284902.iam.gserviceaccount.com'.",
        "ja": "Google カレンダーと連携して、直近の予定の取得、予定の追加が行えます。使用するには、カレンダーを「riiiver@arched-premise-284902.iam.gserviceaccount.com」と共有させる必要があります。"
    },
    "blockType": "service",
    "executor": "RBCCommonWebServiceExecutor",
    "serviceProxy": {
        "service": "scheduleWatch"
    },
    "osType": "none",
    "categoryIds": ["cat_0005"],
    "output": {
        "type": "object",
        "properties": {
            "message": {
                "type": "string",
                "format": "text"
            }
        }
    },
    "preferences": {
        "type": "object",
        "x-field-order":["calendarId", "creatingOrGetting", "eventTitle", "eventDescription", "eventStartTime", "eventEndTime"],
        "properties": {
            "calendarId": {
                "x-input-type": "text",
                "type": "string",
                "x-title": {
                    "en": "Calendar ID",
                    "ja": "カレンダーのID"
                },
                "x-description": {
                    "en": "Enter Google Calendar ID, which is the string of your Gmail address of google accounts.",
                    "ja": "カレンダーのIDを入力してください。使用するGoogleアカウントのGmailアドレスがカレンダーIDです。"
                }
            },
            "creatingOrGetting": {
                "x-input-type": "switch",
                "type": "boolean",
                "x-title": {
                    "en": "Creating or Getting events",
                    "ja": "予定の作成・取得の切り替え"
                },
                "x-description": {
                    "en": "Check the box, if you plan to create event.",
                    "ja": "予定を作成する場合は、チェックをつけてください。"
                },
                "default": false
            },
            "eventTitle": {
                "x-input-type": "text",
                "type": "string",
                "x-title": {
                    "en": "Event Title",
                    "ja": "予定の件名"
                },
                "x-description": {
                    "en": "Input a title of event.",
                    "ja": "予定の件名を入力してください"
                },
                "default": ""
            },
            "eventDescription": {
                "x-input-type": "textarea",
                "type": "string",
                "x-title": {
                    "en": "Event Discription",
                    "ja": "予定の説明"
                },
                "x-description": {
                    "en": "Input a discription of event.",
                    "ja": "予定の説明を入力してください"
                },
                "default": ""
            },
            "eventStartTime": {
                "type": "array",
                "x-title": {
                    "en": "Event Start Time",
                    "ja": "予定の開始時間"
                },
                "x-description": {
                    "ja": "Input the start time of the event.",
                    "en": "予定の開始時間を入力してください。"
                },
                "x-input-type": "time"
            },
            "eventEndTime": {
                "type": "array",
                "x-title": {
                    "en": "Event End Time",
                    "ja": "予定の終了時間"
                },
                "x-description": {
                    "ja": "Input the end time of the event.",
                    "en": "予定の終了時間を入力してください。"
                },
                "x-input-type": "time"
            }
        }
    }
}
今回作成するPieceの要点となる、"preferences", "output"について解説します。
以下を行えるようにしました。
"preferences": {
    "type": "object",
    "x-field-order":["calendarId", "creatingOrGetting", "eventTitle", "eventDescription", "eventStartTime", "eventEndTime"],
    "properties": {
        "calendarId": {
            "x-input-type": "text",
            "type": "string",
            "x-title": {
                "en": "Calendar ID",
                "ja": "カレンダーのID"
            },
            "x-description": {
                "en": "Enter Google Calendar ID, which is the string of your Gmail address of google accounts.",
                "ja": "カレンダーのIDを入力してください。使用するGoogleアカウントのGmailアドレスがカレンダーIDです。"
            }
        },
        "creatingOrGetting": {
            "x-input-type": "radio",
            "type": "string",
            "x-title": {
                "en": "Create or Get Event?",
                "ja": "予定の作成・取得"
            },
            "x-description": {
                "en": "Select to create or get event.",
                "ja": "予定を作成するか取得するかを選んでください。"
            },
            "enum":["isCreating","isGetting"],
            "x-enum-titles":{
                "isCreating":{
                  "en":"Create event",
                  "ja":"作成"
                },
                "isGetting":{
                  "en":"Get event",
                  "ja":"取得"
                }
            },
            "default": "isGetting"
        },
        "eventTitle": {
            "x-input-type": "text",
            "type": "string",
            "x-title": {
                "en": "Event Title",
                "ja": "予定の件名"
            },
            "x-description": {
                "en": "Input a title of event.",
                "ja": "予定の件名を入力してください"
            },
            "default": ""
        },
        "eventDescription": {
            "x-input-type": "textarea",
            "type": "string",
            "x-title": {
                "en": "Event Discription",
                "ja": "予定の説明"
            },
            "x-description": {
                "en": "Input a discription of event.",
                "ja": "予定の説明を入力してください"
            },
            "default": ""
        },
        "eventStartTime": {
            "x-input-type": "time",
            "type": "array",
            "x-title": {
                "en": "Event Start Time",
                "ja": "予定の開始時間"
            },
            "x-description": {
                "ja": "Input the start time of the event.",
                "en": "予定の開始時間を入力してください。"
            }
        },
        "eventEndTime": {
            "x-input-type": "time",
            "type": "array",
            "x-title": {
                "en": "Event End Time",
                "ja": "予定の終了時間"
            },
            "x-description": {
                "ja": "Input the end time of the event.",
                "en": "予定の終了時間を入力してください。"
            }
        }
    }
}
実際のアプリの画面では、以下のようなイメージです。
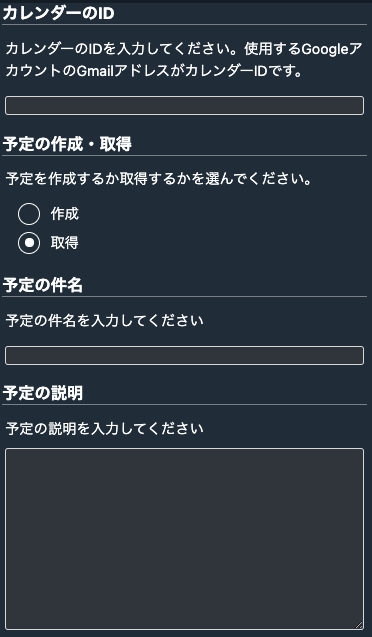

今まで使用していない、ラジオボタンと時間の選択について解説します。
"creatingOrGetting": {
    "x-input-type": "radio",
    "type": "string",
    "x-title": {
        "en": "Create or Get Event?",
        "ja": "予定の作成・取得"
    },
    "x-description": {
        "en": "Select to create or get event.",
        "ja": "予定を作成するか取得するかを選んでください。"
    },
    "enum":["isCreating","isGetting"],
    "x-enum-titles":{
        "isCreating":{
          "en":"Create event",
          "ja":"作成"
        },
        "isGetting":{
          "en":"Get event",
          "ja":"取得"
        }
    },
    "default": "isGetting"
},
x-input-typeをradioにすることで、アプリ側にラジオボタンを設けられます。
drumrollの時と同じで、実際にプログラム側で扱う値を"enum"で指定し、ユーザー側に表示する文言などは"x-enum-titles"で指定します。
"eventStartTime": {
    "x-input-type": "time",
    "type": "array",
    "x-title": {
        "en": "Event Start Time",
        "ja": "予定の開始時間"
    },
    "x-description": {
        "ja": "Input the start time of the event.",
        "en": "予定の開始時間を入力してください。"
    }
}
x-input-typeをtimeにすることで、アプリ側で時間と分を選択できるようになります。
[時間, 分]という配列で、Piece Funcへと渡されます。
またx-field-orderを追加することで、UIの表示順を固定できます。
"x-field-order":["calendarId", "creatingOrGetting", "eventTitle", "eventDescription", "eventStartTime", "eventEndTime"]
配列のインデックス順に表示されます。
次のPieceに文字列を渡せるようにします。
"output": {
    "type": "object",
    "properties": {
        "message": {
            "type": "string",
            "format": "text"
        }
    }
}
文字列のみを渡せるように、"type"は"string","format"は"text"にしています。
"format"については、ドキュメントを参照ください。
次に Piece Funcを解説します。
// node-google-calendarの読み込み
const Calendar = require('node-google-calendar');

// 認証情報をjsonファイルから取得
const key = require('./credentials.json').private_key;
const serviceAcctId = require('./credentials.json').client_id;

// 認証情報と時間設定
const config = {
    key: key,
    serviceAcctId: serviceAcctId,
    timezone: 'UTC+09:00' // 日本時間
};

exports.handler = async (event) => {
    if (event.call === 'lambda') {
        console.log('CALLED:LAMBDA');
        /* If you use the external modules, please code the following: - 外部モジュールを使う場合に記入してくだい。
           e.g.  if ( xxxx !== null ){} // xxxx: instance for the module.  -  xxxx : 生成したインスタンス */

        if (Calendar !== null) { }
        return;
    }

    // カレンダーID
    const calendarId = event["properties"]["preferences"]["calendarId"];
    // カレンダーの取得
    const calendar = new Calendar(config);

    // 現在時間
    const now = new Date();
    now.setHours(now.getHours() + 9);// 日本時間に変換

    // 次のPieceに渡す
    let response;
    let message;

    // カレンダー予定の取得と作成を条件分岐で切り替える
    const creatingOrGetting = event["properties"]["preferences"]["creatingOrGetting"]; // 作成: isCreating、取得:isGetting

    if (creatingOrGetting == "isCreating") {
        // 件名
        const eventTitle = event["properties"]["preferences"]["eventTitle"];

        // 説明文
        const eventDescription = event["properties"]["preferences"]["eventDescription"];

        // 開始時間
        let eventStartTime =  event["properties"]["preferences"]["eventStartTime"];

        // 終了時間
        let eventEndTime = event["properties"]["preferences"]["eventEndTime"];

        let startTime = now;
        startTime.setHours(eventStartTime[0]);
        startTime.setMinutes(eventStartTime[1]);
        startTime = `${startTime.toJSON().slice(0, -5)}+09:00`;

        let endTime = now;
        endTime.setHours(eventEndTime[0]);
        endTime.setMinutes(eventEndTime[1]);
        endTime = `${endTime.toJSON().slice(0, -5)}+09:00`;

        const eventParam = {
            "start": {"dateTime": startTime },
            "end"  : {"dateTime": endTime},
            "summary": eventTitle,
            "description": eventDescription
        };
        try {
            await calendar.Events.insert(calendarId, eventParam);

            message = "予定を追加しました";

            response = {
                status: 200,
                body: {
                    message: message
                }
            };
        } catch (error) {
            console.log("Error message: " + error.message);
        }

        return response;
    } else {
        // 取得する対象期間
        let timeMin = now; // 最小時間
        timeMin = `${now.toJSON().slice(0, -5)}+09:00`; //フォーマット変更

        let timeMax = now; // 最大時間
        timeMax.setHours(now.getHours() + 8); // さらに8時間追加
        timeMax = `${timeMax.toJSON().slice(0, -5)}+09:00`; // フォーマット変更

        const params = {
            timeMin: timeMin,
            timeMax: timeMax,
            singleEvents: true,
            orderBy: "startTime"
        };

        // 直近の予定を取得
        try {
            const result = await calendar.Events.list(calendarId, params);
            const event = result[0];
            const eventName = event.summary;
            message = `次の予定は、${eventName}です。`;

            response = {
                status: 200,
                body: {
                    message: message
                }
            };
        } catch (error) {
            console.log(error);
        }

        return response;
    }
}
大きく以下のことを実行しています。
// カレンダー予定の取得と作成を条件分岐で切り替える
const creatingOrGetting = event["properties"]["preferences"]["creatingOrGetting"]; // 作成: isCreating、取得:isGetting

if (creatingOrGetting == "isCreating") {

} else {

}
ユーザーがアプリ側でどちらのラジオボタンを押したかによって処理を変えています。"isCreating"の場合は「予定の作成」、"isGetting"の場合は「予定の取得」を行います。
// 件名
const eventTitle = event["properties"]["preferences"]["eventTitle"];

// 説明文
const eventDescription = event["properties"]["preferences"]["eventDescription"];

// 開始時間
let eventStartTime =  event["properties"]["preferences"]["eventStartTime"];

// 終了時間
let eventEndTime = event["properties"]["preferences"]["eventEndTime"];

let startTime = now;
startTime.setHours(eventStartTime[0]);
startTime.setMinutes(eventStartTime[1]);
startTime = `${startTtime.toJSON().slice(0, -5)}+09:00`;

let endTime = now;
endTime.setHours(eventEndTime[0]);
endTime.setMinutes(eventEndTime[1]);
endTime = `${endTime.toJSON().slice(0, -5)}+09:00`;

const eventParam = {
    "start": {"dateTime": startTime },
    "end"  : {"dateTime": endTime},
    "summary": eventTitle,
    "description": eventDescription
};

try {
    await calendar.Events.insert(calendarId, eventParam);

    message = "予定を追加しました";

    response = {
        status: 200,
        body: {
            message: message
        }
    };
} catch (error) {
    console.log("Error message: " + error.message);
}

return response;
予定の作成を行うコードです。
この記事の前半で解説した内容通りですが、Pieceとして動作するためtry…catchを使用してエラー回避を行っています。
// 取得する対象期間
let timeMin = now; // 最小時間
timeMin = `${now.toJSON().slice(0, -5)}+09:00`; //フォーマット変更

let timeMax = now; // 最大時間
timeMax.setHours(now.getHours() + 8); // さらに8時間追加
timeMax = `${timeMax.toJSON().slice(0, -5)}+09:00`; // フォーマット変更

const params = {
    timeMin: timeMin,
    timeMax: timeMax,
    singleEvents: true,
    orderBy: "startTime"
};

// 直近の予定を取得
try {
    const result = await calendar.Events.list(calendarId, params);
    const event = result[0];
    const eventName = event.summary;
    message = `次の予定は、${eventName}です。`;

    response = {
        status: 200,
        body: {
            message: message
        }
    };
} catch (error) {
    console.log(error);
}

return response;
予定を取得するコードです。こちらも基本的に解説した内容通りです。
const params = {
    timeMin: timeMin,
    timeMax: timeMax,
    singleEvents: true,
    orderBy: "startTime"
};
パラメーターにsingleEventsとorderByを追加しています。
singleEventsをtrueとすることで、「繰り返し」で登録した予定をそれぞれ1つずつの予定として取得できます。これとセットでorderByが使用できるようになり、取得したイベントのインデックスの順番を設定できます。今回はstartTime、つまり開始時間の近い順に並ぶようにしています。
const result = await calendar.Events.list(calendarId, params);
const event = result[0];
const eventName = event.summary;
message = `次の予定は、${eventName}です。`;
直近の予定を取得するために、インデックスで0を指定しています。また、そこからsummaryを抜き出して直近の予定の件名を取得しています。
前回のスプレッドシート、今回のグーグルカレンダーとグーグルサービス2種類の扱い方を学びました。是非、他のグーグルサービスとRiiiverを連携させてみてください。
ご覧くださいましてありがとうございました。